
|
|
|
|
#1
 12-28-2008, 10:44 PM
|
|||
|
|||
|
Donation knife build along
I have not posted a new knife project here for some time so I thought I would share this work in progress. I'm making a custom knife and sheath as a donation to the Wisconsin Bowhunters (WBH) to be used at the annual convention in March.
I thought I would share the steps that go into the making of this custom knife as sort of a build along. The blade is a drop point hunter and is forged Damascus Steel made from 1095 and 15N20 steels. I did not make the blank but rather purchased it as I do not have the tools or capabilities to make Damascus. I could have made the blank myself from O1 steel like I have in the past but I wanted this knife to unique and special so I went with a Damascus blade with a lot of character. Every Damascus blade is a one-of-a-kind. The blank is a hefty 1/8 inch thick with a 3 1/2 inch blade and a 4 1/2 inch handle. The blank is mar-quenched and tempered to a Rockwell hardness of 57. This knife is sure to have great edge holding ability. 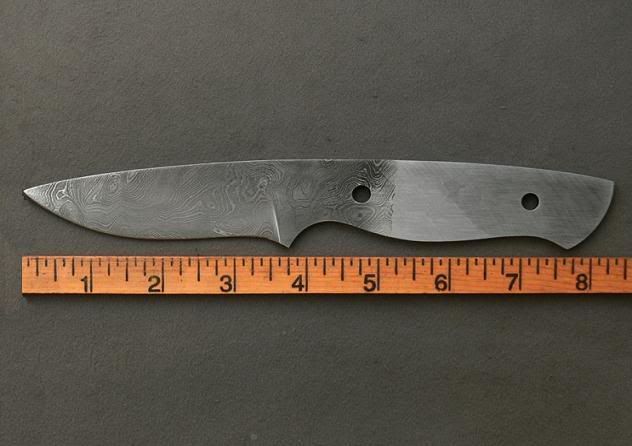 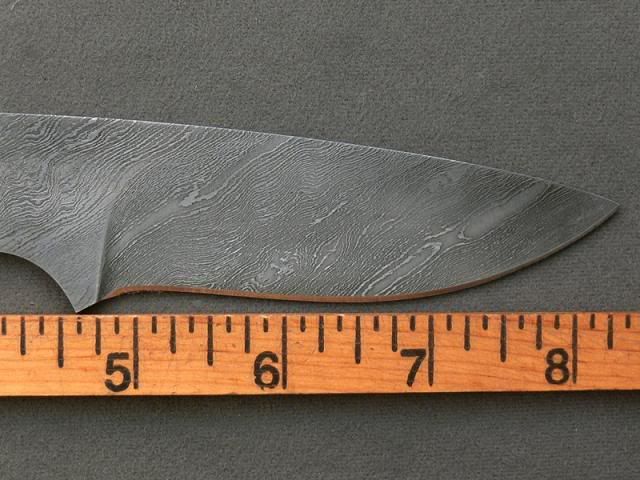 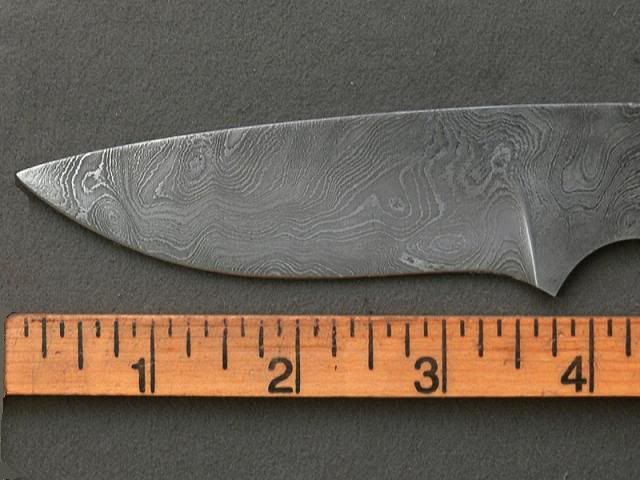 For the scales of the knife (sides of the handle) I wanted to keep the whole idea of the swirling pattern in the blade and in keeping with the one-of-a-kind idea so I am using hard rock maple burl died green (WBH color) and stabilized which will prevent the normal swelling and shrinking that happens to wood. 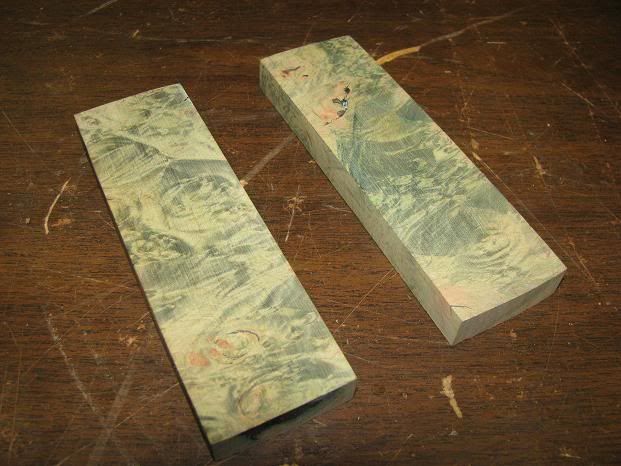 Normally, swelling and shrinking is not a problem with this sort of handle but I want to make extra sure the wood is stabilized because I am going to be inlaying metal and enamel WBH logos into the handle and I don't want the future owner to feel a line where the medallions and the wood meet and I want to make sure the medallions stay put for the life of the knife.  In keeping with uniqueness, I want all the little things to have detail. Rather than using a single material pin such as brass or copper or silver nickle or even aluminum I am making custom pins for the joint between the scales and the blade blank. I am making mosaic pins with an aluminum outer sleeve followed by a brass sleeve and then 3 aluminum pins inside the brass tube. All the parts of the mosaic pins will be held in place with J.B. Weld because I want the black background to contrast with the shiny aluminum just like the black and sliver lines in the blade. 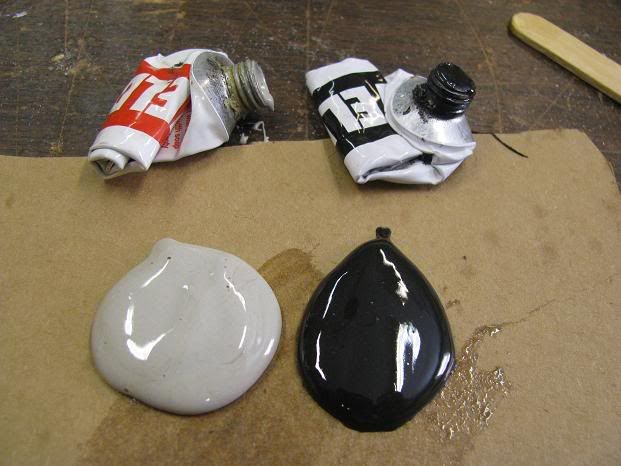 Here they are after the epoxy is set and I ground the end flat on a belt sander. 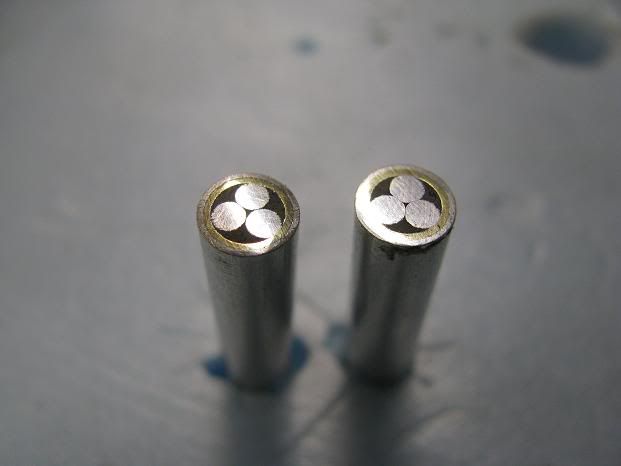 And a close up. 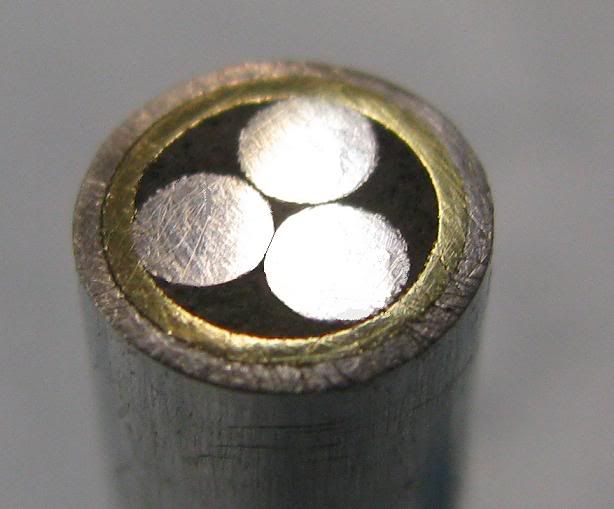 Next up is fitting and attaching the scales..................
__________________
http://staysharpguide.com/ 
|
|
#2
12-29-2008, 09:44 AM
|
|||
|
|||
|
I rough shaped the maple scales to fit the blank. I held the sides in place with two scrap pins.
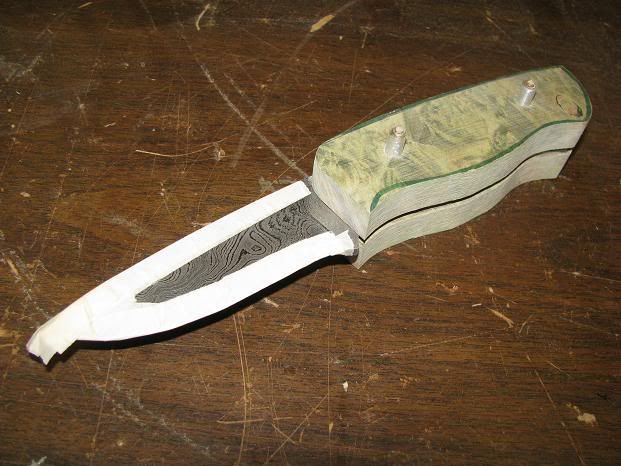 Next, I roughed up the handle portion of the blank as well as the glue sides of the scales. Epoxy does much better with a rough surface than a smooth one. 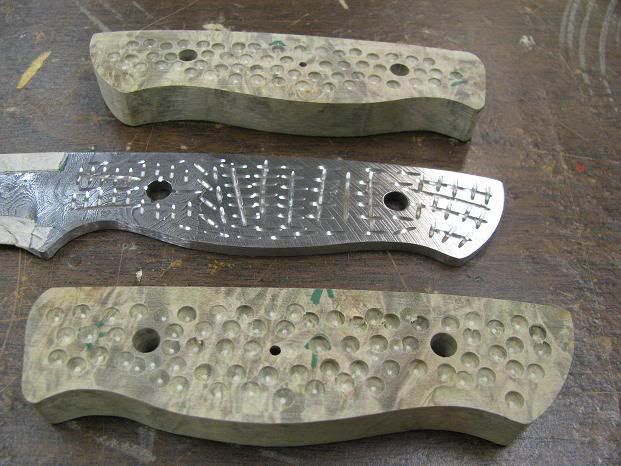 I then drilled a shallow pocket in each scale for the WBH medallion. 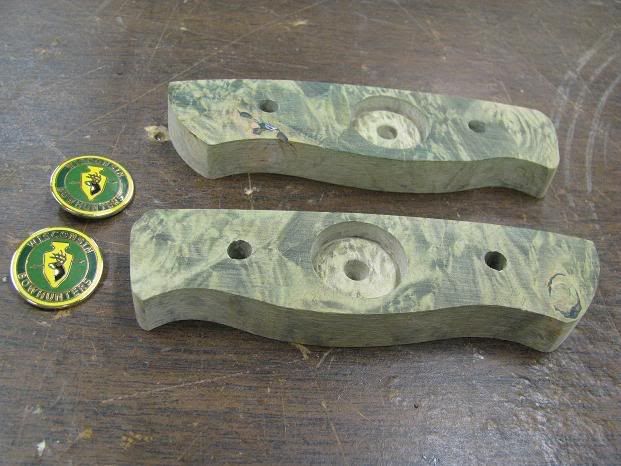 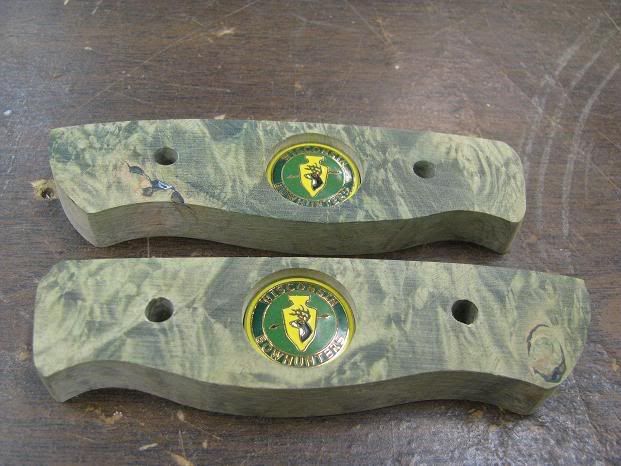 To prevent scratching the blade, I pre-shaped the front end of the scales before attaching them to the blank. 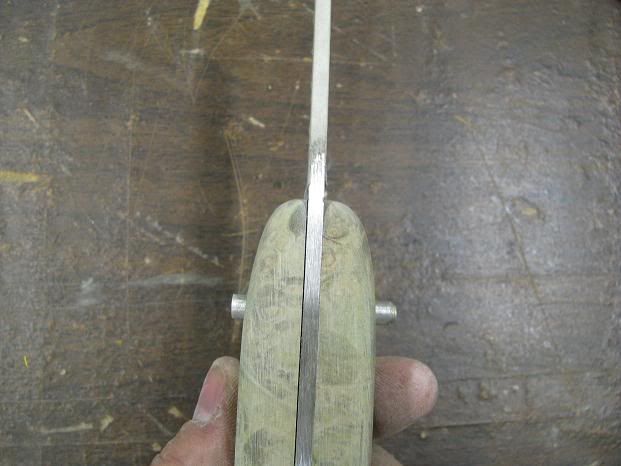 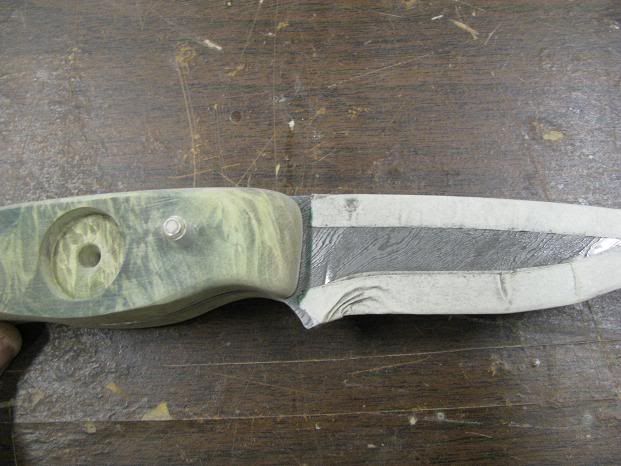 The final prep work for the scales was to epoxy the medallions in place. 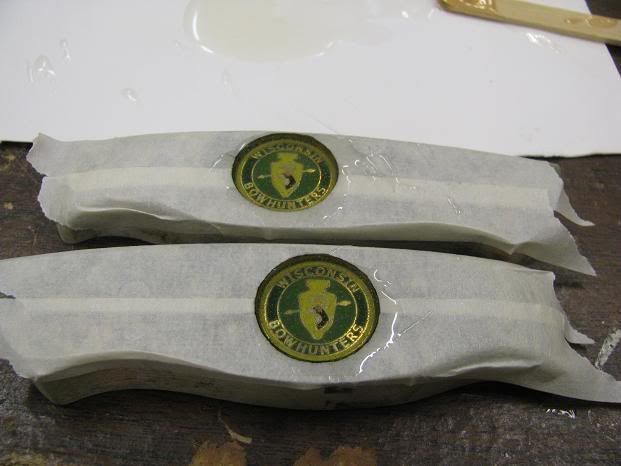 Once the epoxy that holds the medallions in place was cured, I attached both knife scales to the handle of the blade blank. I masked off all the areas of both the blank and the handle that I did not want to get epoxy on. This epoxy has a 3,500 pound holding strength and the wood scales and the knife blank are now forever joined. 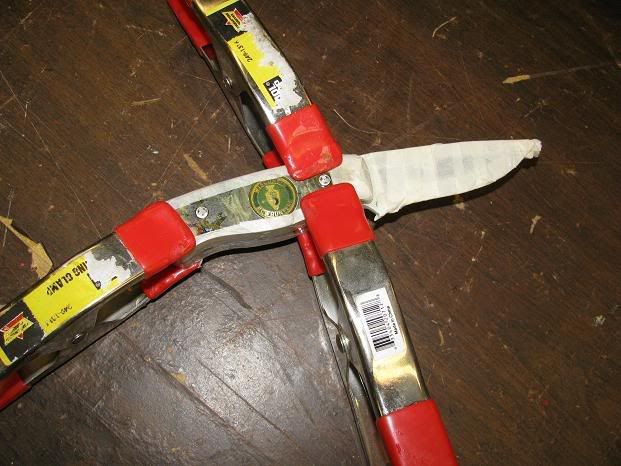 Next up, shaping the handle.............
__________________
http://staysharpguide.com/
|
|
#3
12-30-2008, 09:11 AM
|
|||
|
|||
|
After 24 hours, the clamps are removed and thus begins the tedious task of getting off the epoxy covered tape.
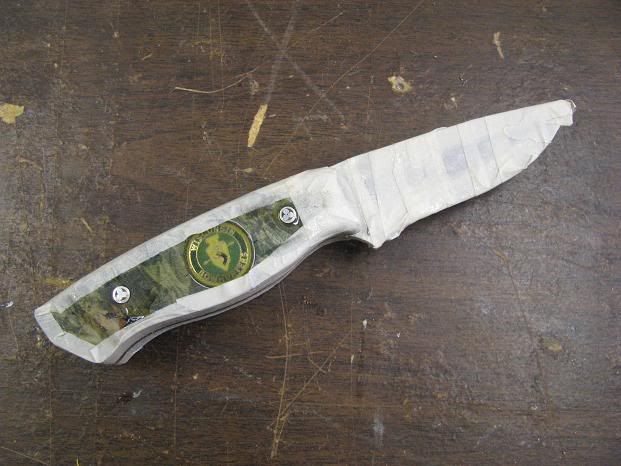  The joint is a good one with no gaps, just a nice thin line of epoxy between the blank and the scales. 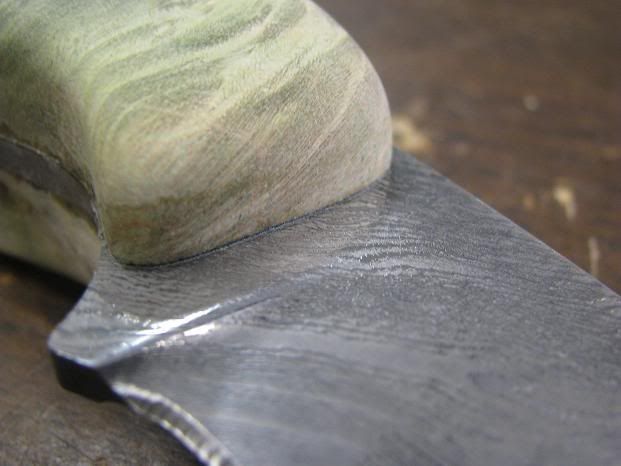 The next step is to shape and smooth the handle. This is done with belt and palm sanders with various grits and then hand sanding and finally steel wool. I am pleased with how well the WBH logo shows through the epoxy. 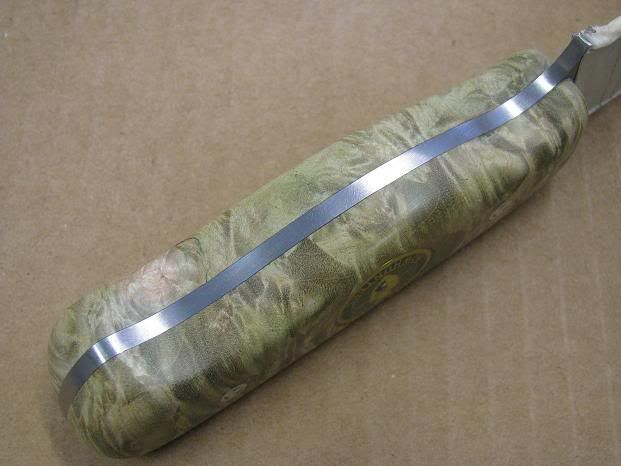  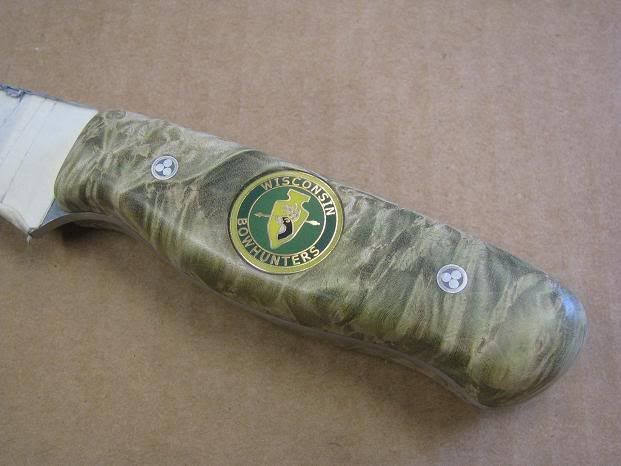 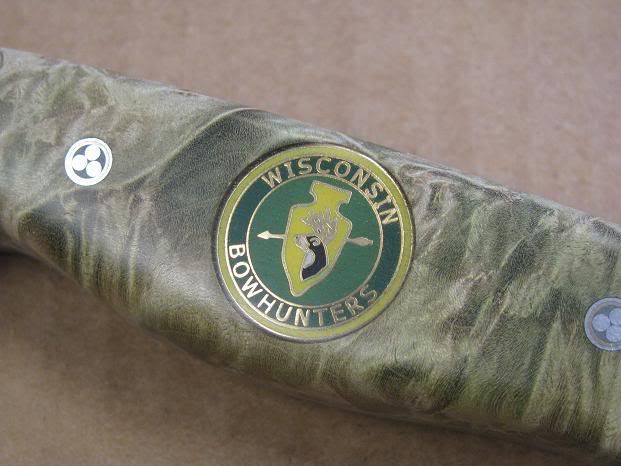 The final step to finishing the handle is to apply several coats of tung oil finish. I rub each coat in with my finger tip and let it dry for 24 hours. I then buff it with fine steel wool and apply another coat. 4 coats should be enough. This wood has already been stabilized, It is already water proofed but this will further seal and water proof the wood and act as more of a protective coating that will take the abuse of every day use and if scratched, can be repaired with another rubbing with Tung oil and a little buffing. 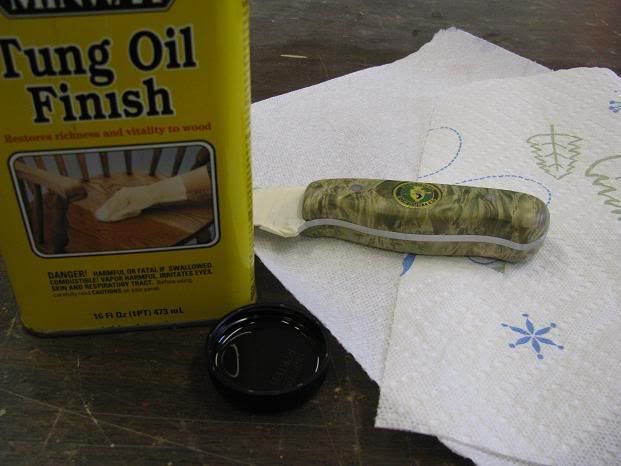 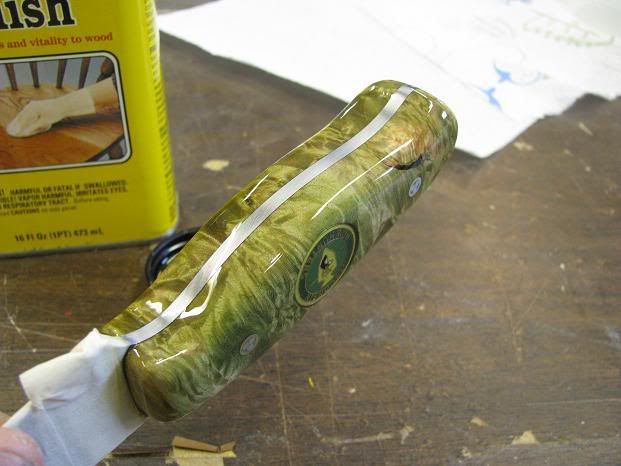 While the four coats are applied and drying, It's time to make a sheath................
__________________
http://staysharpguide.com/
|
|
#4
12-30-2008, 12:03 PM
|
||||
|
||||
|
Hi Rancid Crabtree, it looks great and thanks for posting.
How did you get the JB Weld into the brass sleeve? It looks like the scales are held on with only glue and the pins are mostly decorative. The pins don't look like they are peened. Looking forward to the sheath making part. Allen
__________________
Member: The Red Mist Culture
|
|
#5
12-30-2008, 12:26 PM
|
|||
|
|||
|
Correct, now adays pins are mostly decorative The epoxy does all the work. Prior to that, pins were peened over but eventually everything got loose and the pins had to be peened again until the wood split.
 As far as getting the JB into the tube, I mixed it while warm so it flows very well. I also coated the pins in JB prior to inserting them into the JB filled tube. I plugged one end to keep the excess from running out.
__________________
http://staysharpguide.com/
|
|
#6
12-30-2008, 01:19 PM
|
||||
|
||||
|
That is one nice knife... I don't have that kind of talent. I have been helping a kinfe building friend of mine with one for myself, and I know how hard it is to get the blade just right.
__________________
It doesn't matter what you hunt, as long as you hunt <hr> Member - AOPA - Lloydminster & Area Archery Assoc. - Life Member NAHC - IBEP Instructor
|
|
#7
12-30-2008, 04:17 PM
|
|||
|
|||
|
That's a beautiful job!
__________________
May we never confuse honest dissent with disloyal subversion. Dwight D. Eisenhower "If the freedom of speech is taken away, then dumb and silent we may be led, like sheep to the slaughter" George Washington Jack@huntchat.com
|
|
#8
12-30-2008, 06:24 PM
|
||||
|
||||
|
outstanding !!!
Truly beautiful work there, And that comes from someone who "used" to call himself a woodworker.
You have my humbled awe. 
__________________
"The life of this aina', this land, is perpetuated in righteousness for you and I, the people..." bruddah IZ, Israel Kamakawiwo'ole
|
|
#9
12-31-2008, 09:02 AM
|
|||
|
|||
|
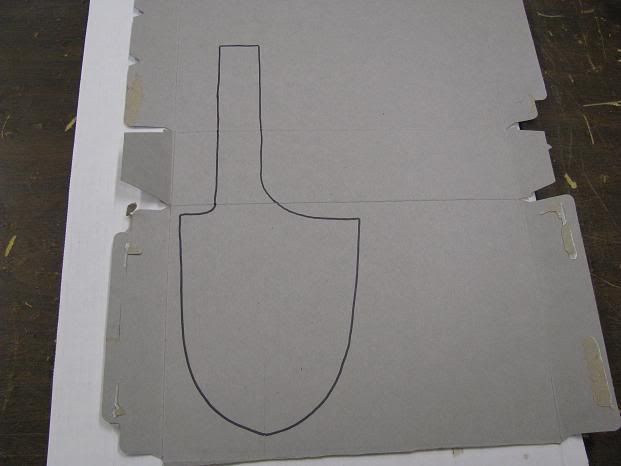
In between coats 3 and 4, I used the knife to make the pattern for the sheath. I always make a pattern out of my favorite leather substitute.............. Cereal box paper board. This sheath will hold the knife by friction with a deep pocket that goes part way up the handle. It is a one piece with a folded belt loop.
  Seems like a good fit. 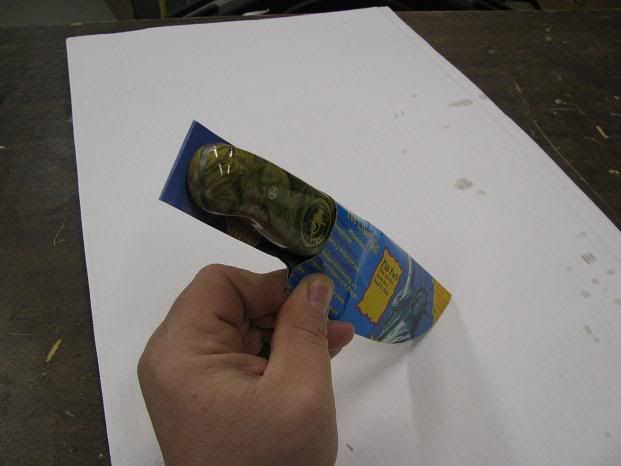 I then transfer the pattern to some creamy 8 Oz. Veg. tanned leather and cut it out with a razor knife. 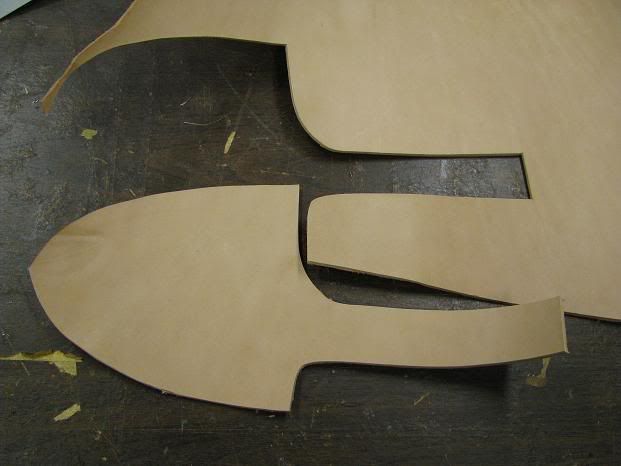 The first step is tapering the end of the belt loop so I have less bulk down in the pocket of the sheath.  Then I crease and wet the leather to make the fold. 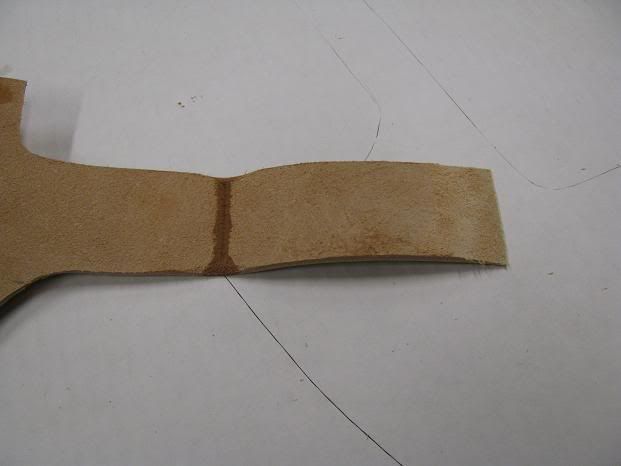 I hold everything in place for stitching with rubber cement. 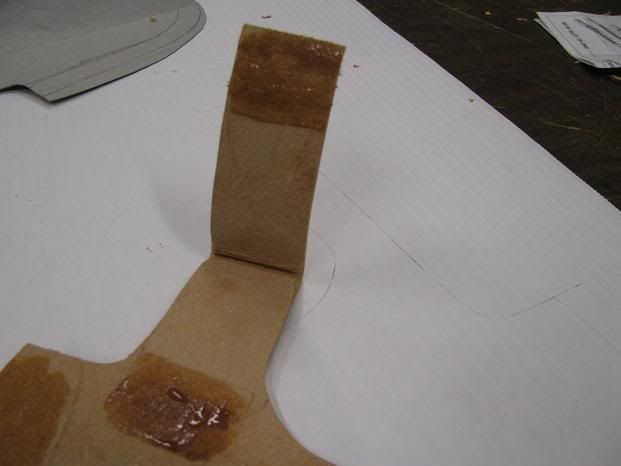 Then punch the stitching holes with a forked punch. 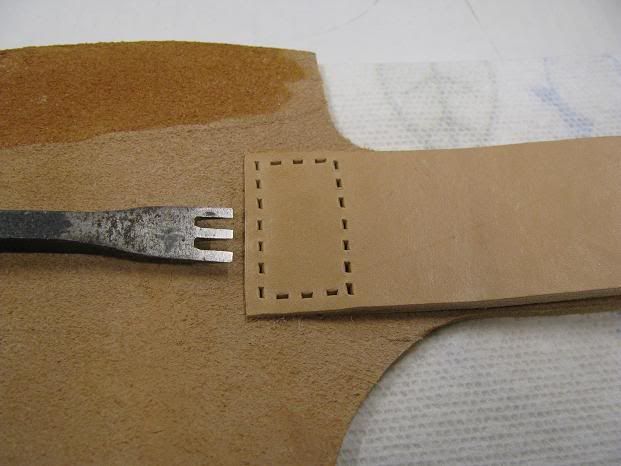 I want to see the stitching so I am using a waxed white cord. I put a needle at each end of the cord and stitch back and forth around the hole pattern. 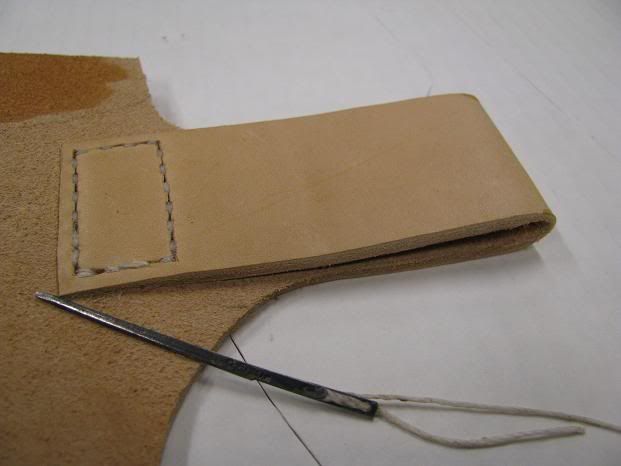 Before I fold the sheath in half, I add a welt made from 4 Oz. leather. It protects the stitching and adds a layer of leather thickness so the blade has room in the sheath. 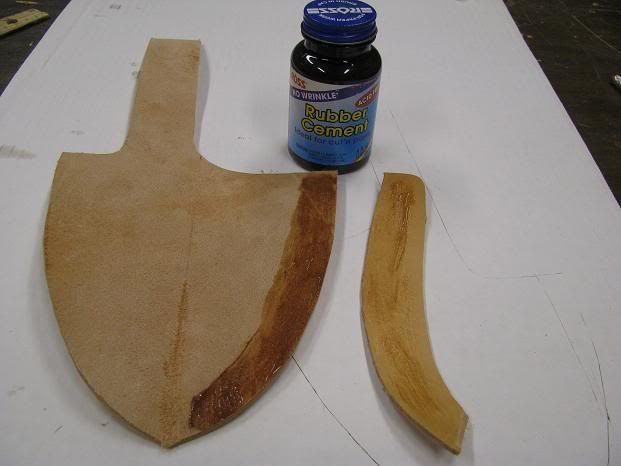
__________________
http://staysharpguide.com/
|
|
#10
12-31-2008, 09:03 AM
|
|||
|
|||
|
Once cemented, I wet the leather with a small paint brush and stamp in a pattern along the edge of where the stitching will go.
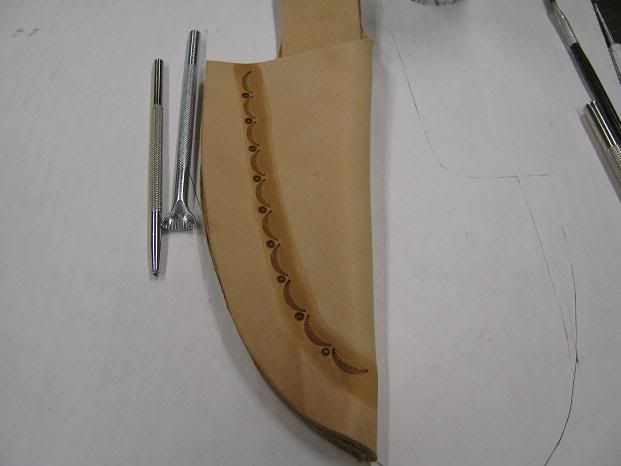 And then punch the stitching holes. 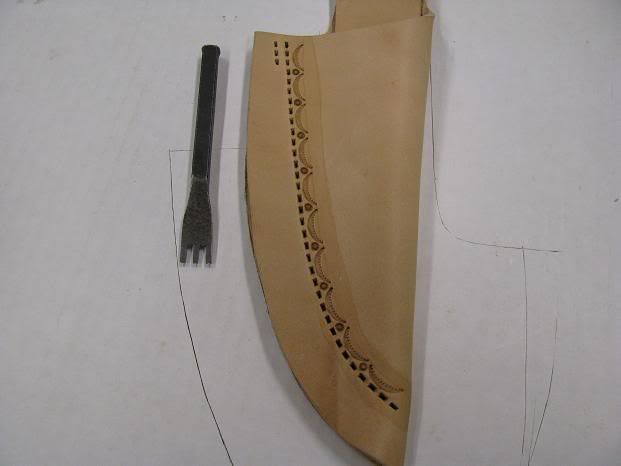 Using the same white cord and double needle method, I join the two sides and the welt. 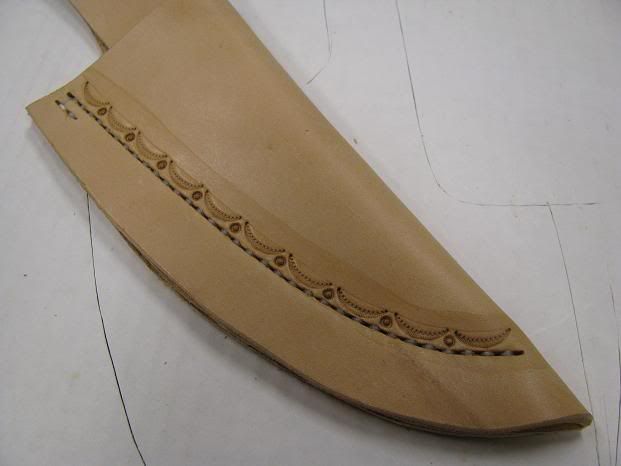 It's hard on the hands and a pliers is needed to pull the needle through but the end result looks pretty good. 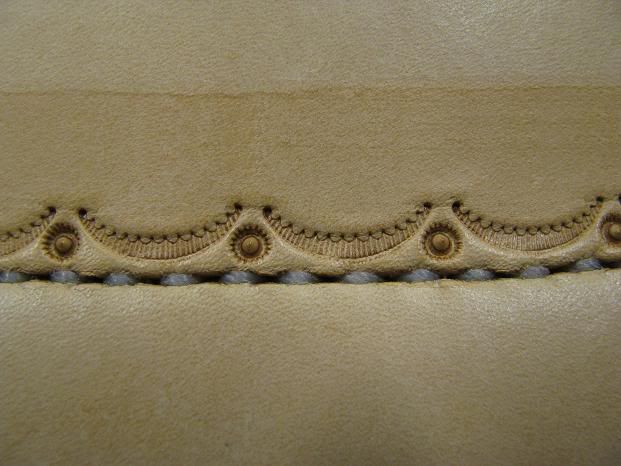 With the stitching complete, I trim off the excess leather. 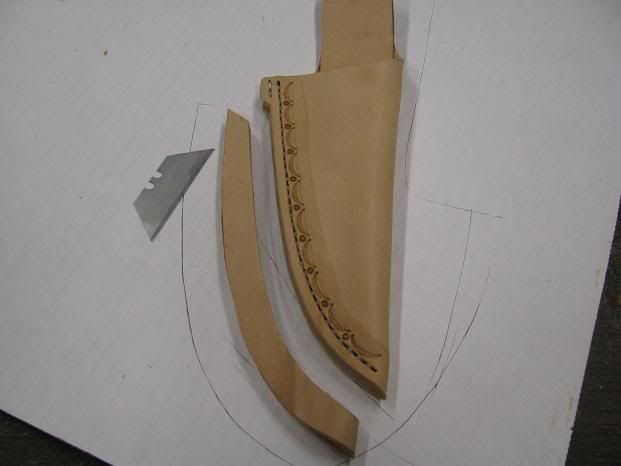 8 Oz. leather is pretty stiff but once wetted, It can be formed and molded like clay to the shape of the knife. 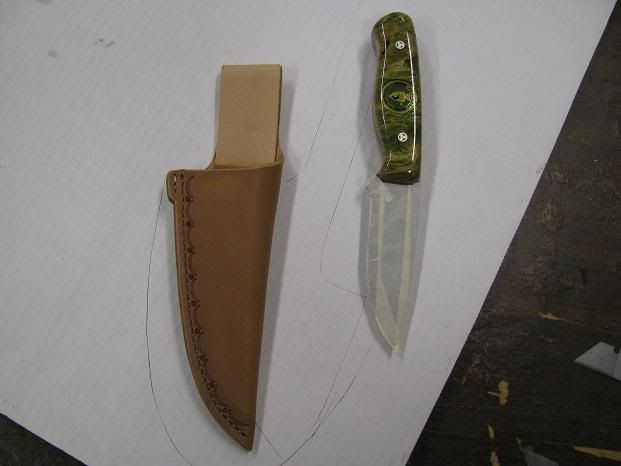 A little time at the end of a blow dryer, locks the shape into the leather. 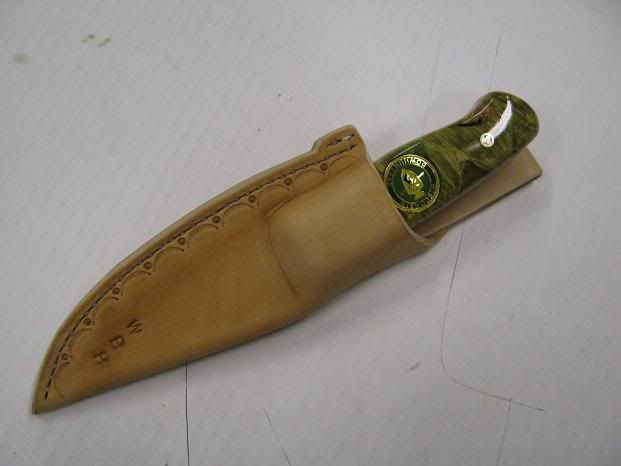 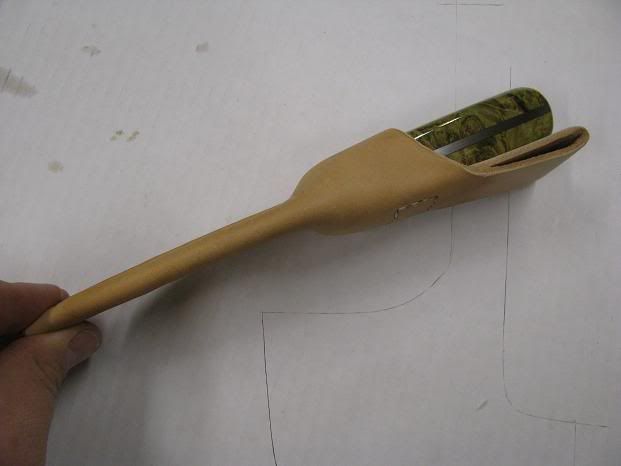 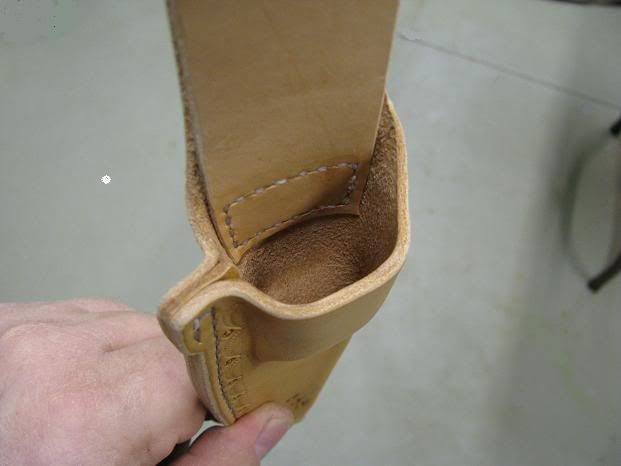 The next step is to give it a bit of color. I mixed, brown and Ox Blood and a little alcohol to get the reddish brown I was looking for. 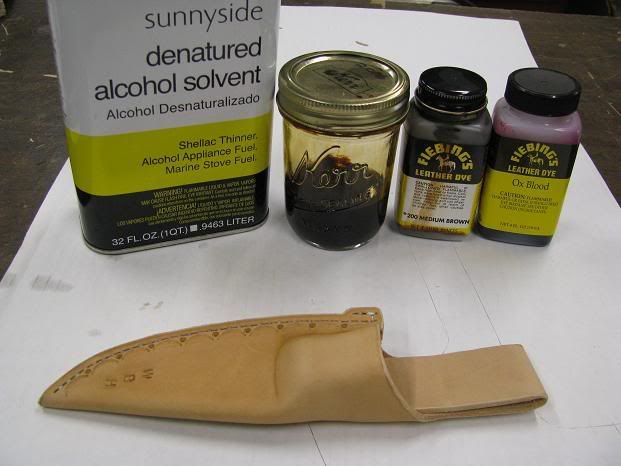 Once all the alcohol is evaporated, I need to replace all the oils lost during the forming and dyeing process. I use warm neatsfoot oil and a cotton daubber. The oil also darkens the leather a bit more. 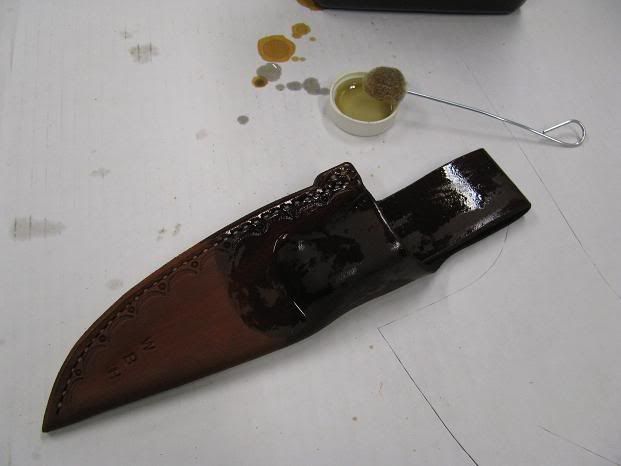 After sitting for a few hours wrapped in a paper towel, I warm the sheath with a blow dryer and apply a rub down of mink oil to further condition the water proof the leather. It turned out pretty good considering it's humble beginnings and will hopefully protect the knife better than it protected the cow that once wore it.   On the off chance that the future owner of this knife does not want to take her into the field and put her to work, I will design and build a display stand so it can sit all pretty like. The Damascus blade should not be stored in the sheath for long periods of time not to mention what a shame it would be to hide that blade from view.
__________________
http://staysharpguide.com/
|
|
#11
12-31-2008, 11:17 AM
|
|||
|
|||
|
Donation knife build along
Rancid, You forgot to tell everyone that preplanning and patience is the key to your type of project! The question I have since I need to re-attach a ebony slab to the side of a folding hunter is; What specific brand and type of epoxy do you use that has a great holding power? I would greatly appreciate that information.
A beautuful knife that should have a chance to show what it was made for.
|
|
#12
12-31-2008, 11:51 AM
|
|||
|
|||
|
The brand of epoxy does not matter so long as you get the slowest curing type you can find. I use extended cure which gives me a half hour of set up and takes 12 hours to fully sure. It has a holding strength of 3,500 psi and will be stronger than the wood you use for the scale.
Make sure to rough up both surfaces to be joined and clean with a de-greasing solvent like acetone. Here is a sneak peak at the display base. I will use some grainy Bubinga and some sort of deer antler. 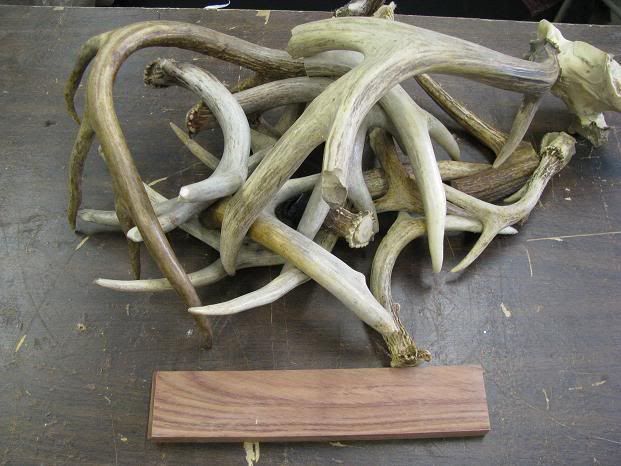
__________________
http://staysharpguide.com/
|
|
#14
12-31-2008, 06:35 PM
|
|||
|
|||
|
Donation knife build along
Rancid, Thanks for the information. I will do some label reading before I buy a new tube. I use Acra-glas to bond a great number of things but even though I let it set 12 hours, it does start to turn over in about 10 minutes. I will look for a longer cure time.
|
|
#15
01-03-2009, 03:29 PM
|
|||
|
|||
|
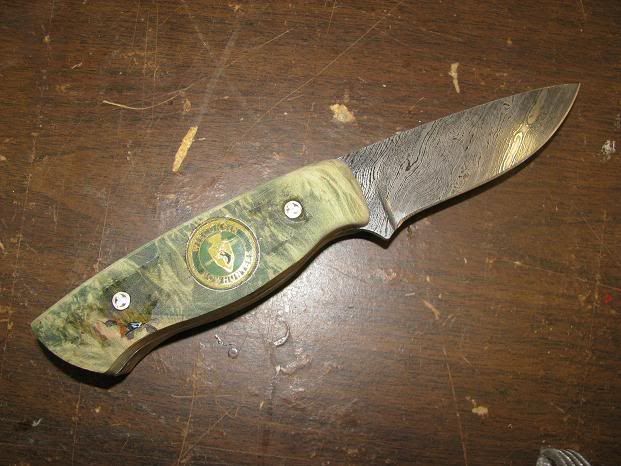
With all the coats of tung oil dry on the handle and the finish on the base dry, I took a few snapshots of the finished knife.
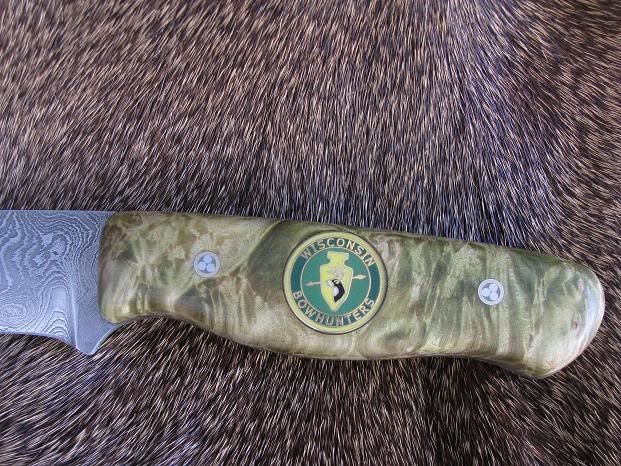 I'm pleased with the look of the pins. 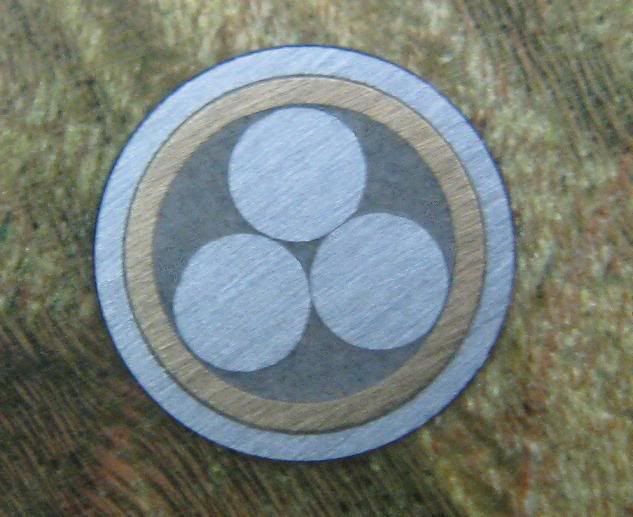 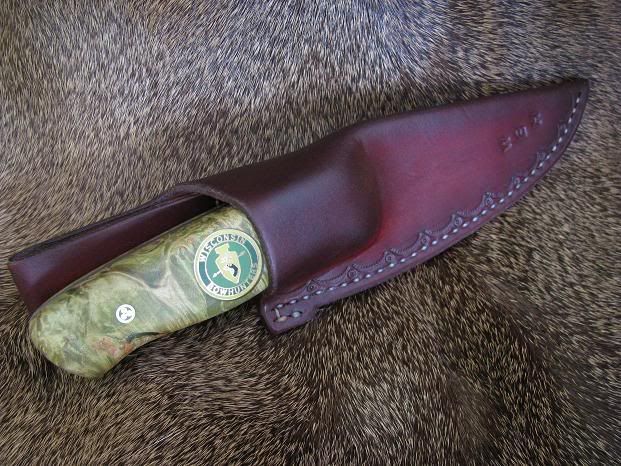 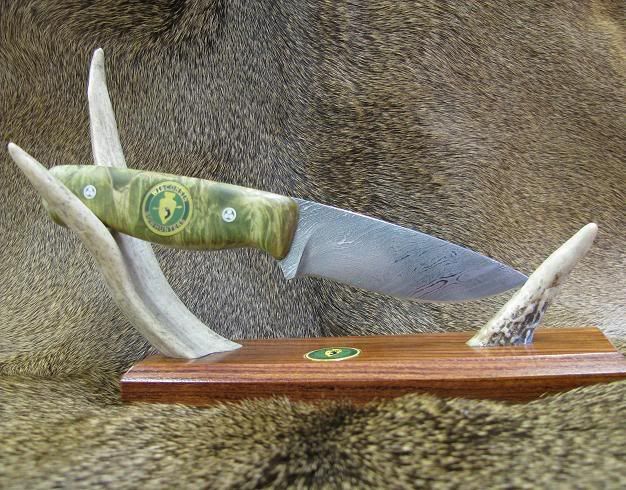 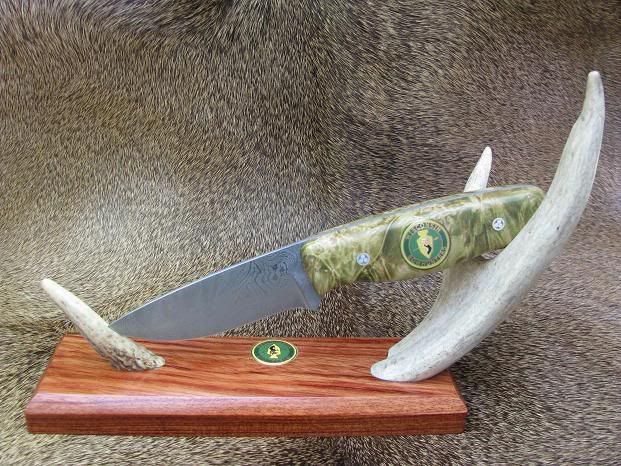 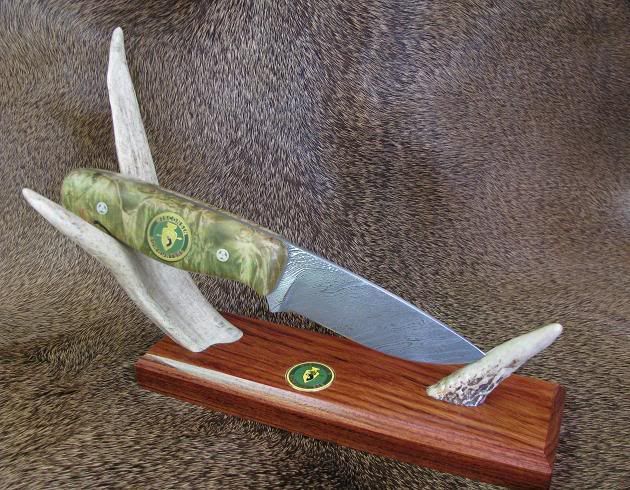 I hope the future owner enjoys it.
__________________
http://staysharpguide.com/
|
 |
| Thread Tools | |
| Display Modes | |
|
|


 Hybrid Mode
