
|
|
|
|
#1
 12-14-2007, 05:29 PM
|
|||
|
|||
|
Lets hear about what you've already built
Some of you guys are surely pretty clever and have built yourself some handy tools etc.
I'd like to hear about them. Saved yourself some money or built it better or stronger yourself Here is your invitation to brag about it. So lets see what you built. 
|
|
#2
12-19-2007, 04:27 AM
|
|||
|
|||
|
What I would like to see is something I can add to the club rifle benches that would be user friendly to all. I see some adjustable V rests at stores that are the cats meow but leaving them at the range is a no on for sure. I would like to make something I can mount permanent. Must be height adjustable too...like with a big wing or something but also not rust up out there...
__________________
mugrump
|
|
#3
12-19-2007, 01:42 PM
|
||||
|
||||
|
I think this would suit your purpose for the range as you could bolt it to the benches.
it's a variation of one my uncle built. basically it's a tripod mounted adjustable rest.he took a 1 inch nut,drilled the threads out, and welded legs to it to form the tripod(if you used 1"x1/4" flat iron for the legs the could be drilled to mount solid to the bench.).another 1 inch nut with 3"x1/4" cold roll arms sits above it for adjusting.thru them both goes a 1"x4" bolt that the rest is welded to.he used a piece of flat iron and an elk hide bag that he made,but for your purpose a piece of angle iron would do if it was padded. any descent paint would keep it from rusting and the occasional squirt on the threads with a wd-40 or such would work there.stainless is another option if you're a better welder than me. just a thought-if you bolted 1 leg down and left a 1/4" play you could still rotate the rest on the bench making it more user friendly for south paw shooters etc. and still keep it from disappearing.forgot to add that a washer welded to the bottom of the main bolt will keep it from being removed from the rest of the rest. sorry for the crummy illustration-but you get the idea I hope. 
__________________
A shootin iron is a tool used for shootin much like a branding iron is a tool used for branding Last edited by Brother Rockeye; 12-19-2007 at 01:51 PM.
|
|
#4
12-20-2007, 01:23 AM
|
|||
|
|||
|
Very good and well illustrated. Will work on this for sure. I like the idea that it can be rotated to the left or right shooter on a bench...and still remain there for the next user....the selling feature for sure.
__________________
mugrump
|
|
#5
02-15-2008, 09:00 AM
|
|||
|
|||
|
I built the snipod out of the 5/8 dowels, radiator tubing and 550 cord, the short one is fine, but i built a slightly taller one for shooting off the hood of my truck.
It took some time to figure out the best way to tie and wrap the 550 cord, but I got it figured out.
__________________
I cried because I had no shoes, till I met a man who had no feet....so I asked him, "Can I have your shoes? You aren't using them." "Sometimes I wonder whether the world is being run by smart people who are putting us on or by imbeciles who really mean it." --Mark Twain
|
|
#6
04-22-2008, 07:11 AM
|
|||
|
|||
|
Critch....shooting off the hood of a truck is funny to me since I watched a guy slice a path from one side to the other...guess he wasn't elevated enough..so after that..I never even give that a thought...I just laugh at him every time I think of that....and I did make the bench rest as stated by brother rocky...works fine...and thanks....doing 2 more now for other benches...guess same as what can buy but why buy when can make...right?
__________________
mugrump
|
|
#7
05-01-2008, 12:40 PM
|
||||
|
||||
|
glad to hear it worked out for you skeeter.I like to build my own gear so it can be made to suit the purpose...and I'm a loooooooong way from town.
 have to add-a buddy of mine broke the windshield in his pickup shooting his .280 across the roof.
__________________
A shootin iron is a tool used for shootin much like a branding iron is a tool used for branding
|
|
#8
07-30-2008, 06:53 AM
|
|||
|
|||
|
I love making homemade stuff. I needed a new arm guard so I set out to make my own. I used a piece of 5 Oz. tooling leather because it can be stamped easily.
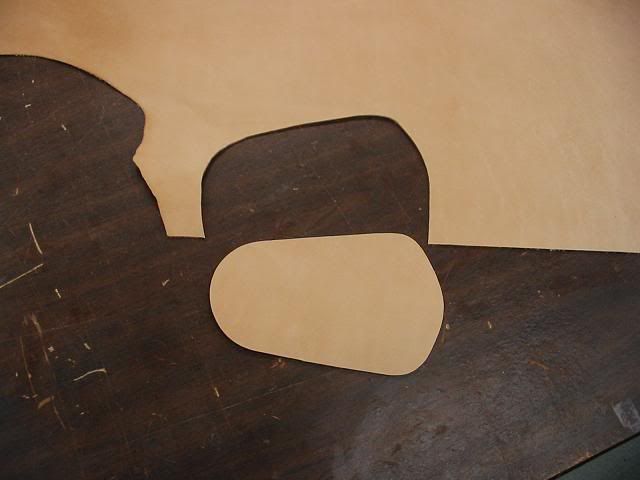 In order to do the tooling, I needed to wet the leather. 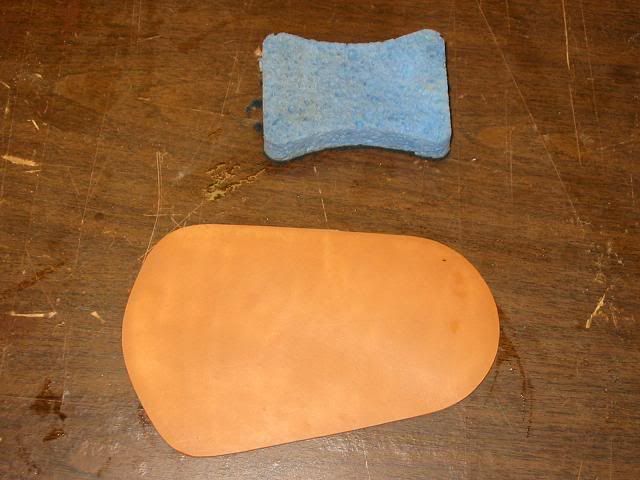 I used some standard leather tools but I had to make the deer's foot and the arrowhead stamp. I used a bolt and a pin to make them 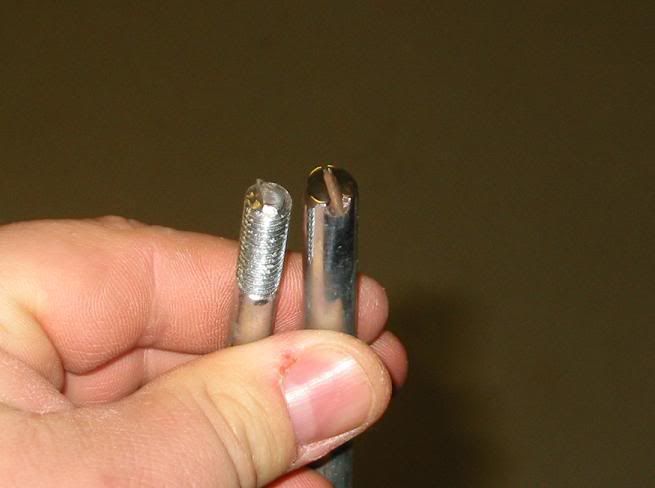 The tooling part is done and I still need to make the leather backing and the antler buttons. 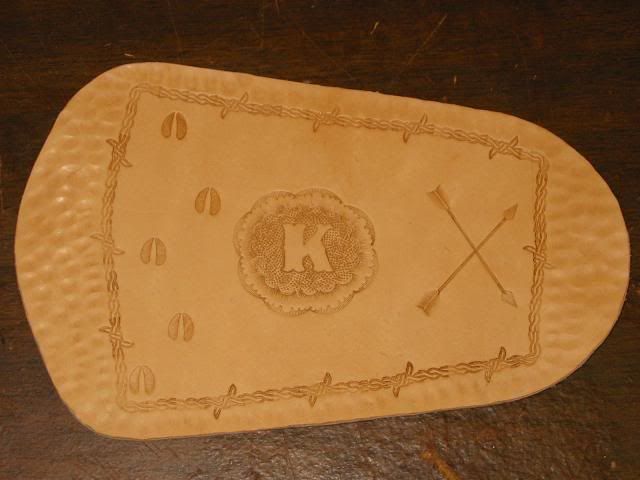 With the leather completely dry, I added some edge kote to the cut end of the arm guard. This will water proof and seal the edge and keep it from swelling and getting fuzzy over time. 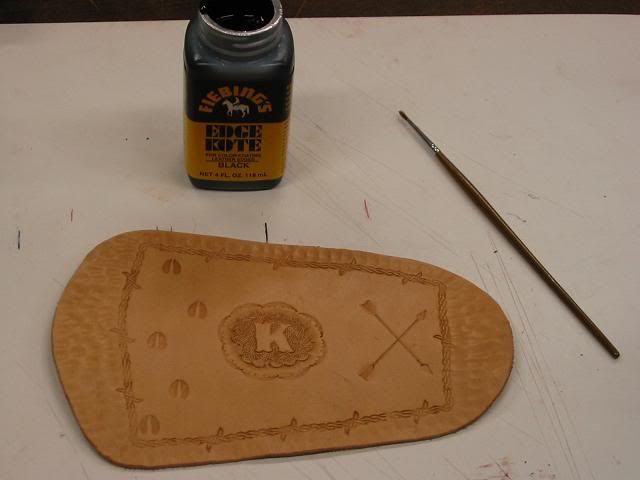 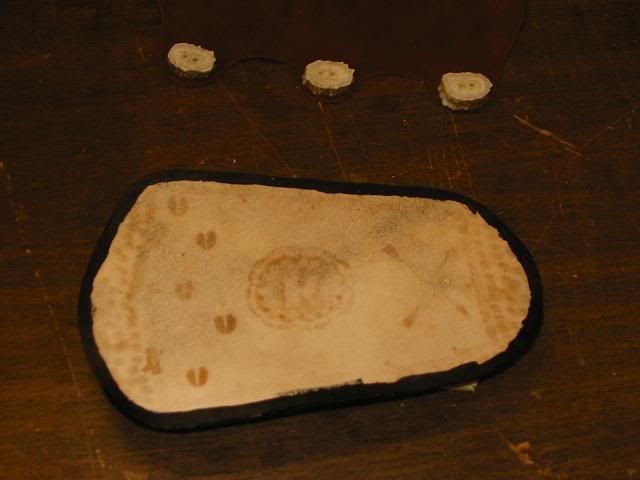 Next I made the antler buttons by cutting them with a hack saw. and then drilling holes for lacing. 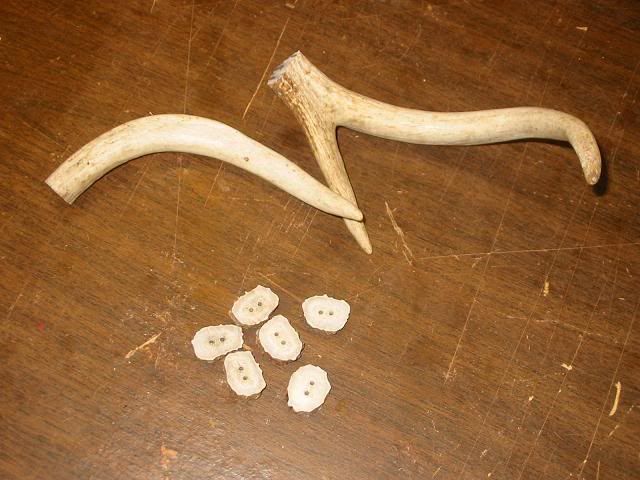 Next I made a cardboard template for the soft leather backing and cut the backing out of a very soft glove leather. 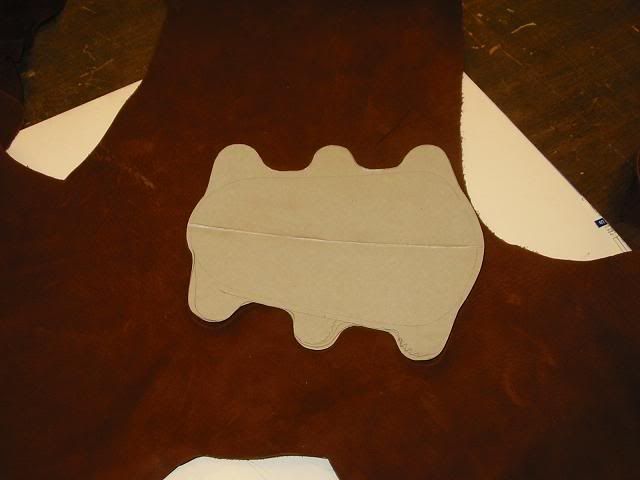 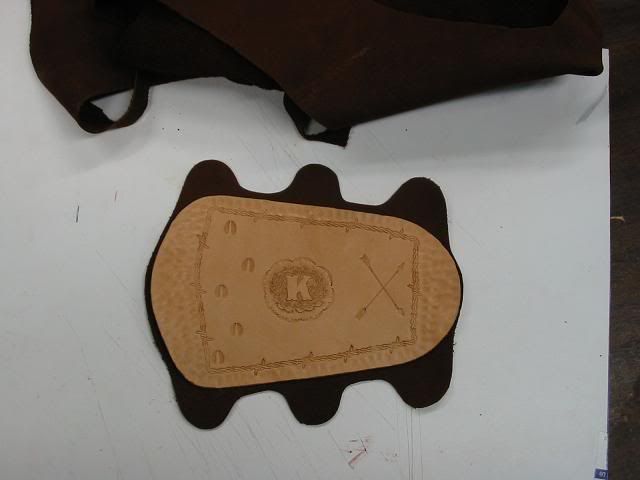 I used some rubber cement to join the two pieces of leather and then used a forked punch to make the holes for the stitching. I used a heavy upholsters thread and double stitched it by hand. 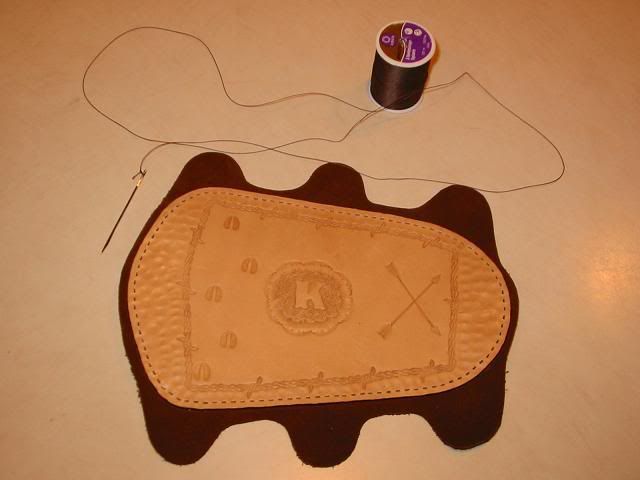 Next, I attached the deer antler buttons using a braided waxed thread/cord and applied Super Sheen to the face of the leather to waterproof it and give it a nice shine. 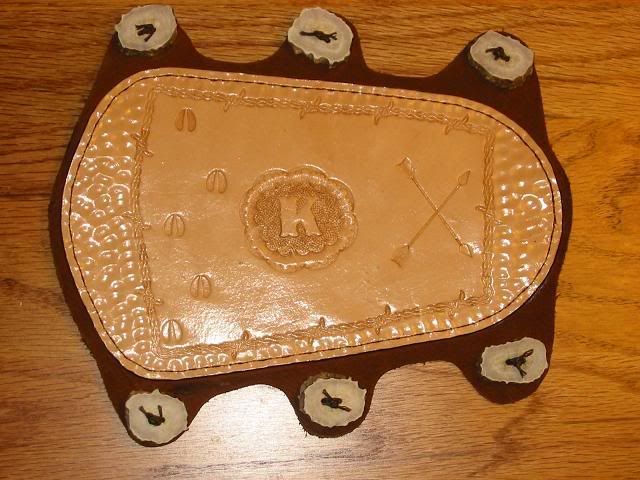 I then cut a leather thong from a circle of soft buffalo hide for lacing. 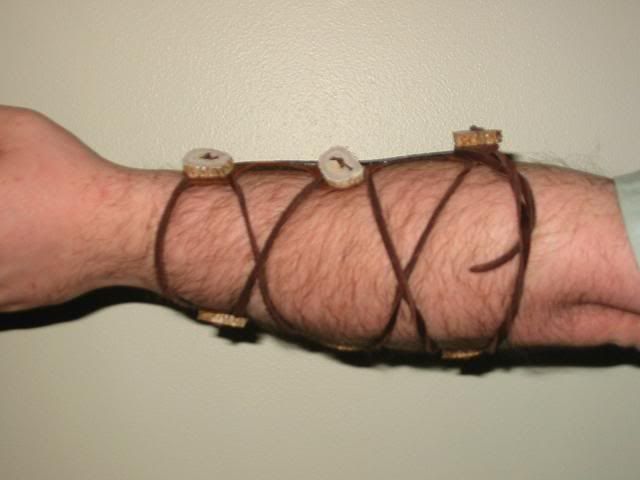 Finished. 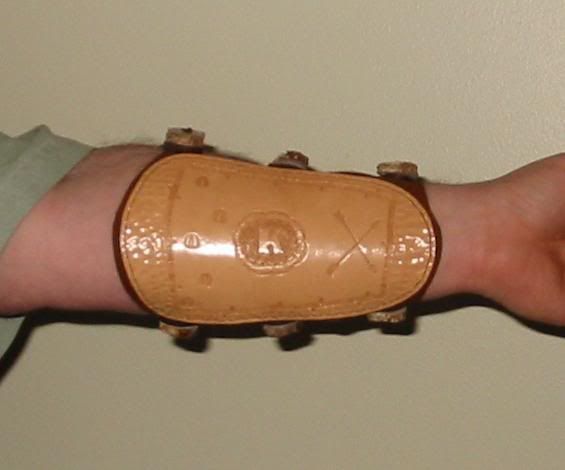
__________________
http://staysharpguide.com/
|
|
#9
07-30-2008, 08:02 AM
|
|||
|
|||
|
Now that is very interesting and some nice work. Thanks for the post.
__________________
mugrump
|
|
#10
07-30-2008, 12:57 PM
|
|||
|
|||
|
Lets hear about what you've built
Skeet, You have to come to Wyoming to hunt priarie dogs. Shooting over the hood is the accepted method, but I do watch to see that all of the shooters make use of the sandbags and have enough barrel elevation to avoid the hood, antenna, wipers and windshield. I used to have a Blazer that had a hole in the right door post from a 38 Special. I didn't put it there, a friend did.
I always say I would get a license for a bighorn sheep but I don't know any guides who are stout enough to haul a pickup hood up those mountains. I can't hit a damn thing unless I am shooting over a hood.
|
 |
|
|


 Hybrid Mode
