
|
|
#1
 08-06-2008, 07:03 AM
|
|||
|
|||
|
How to build a Tipi
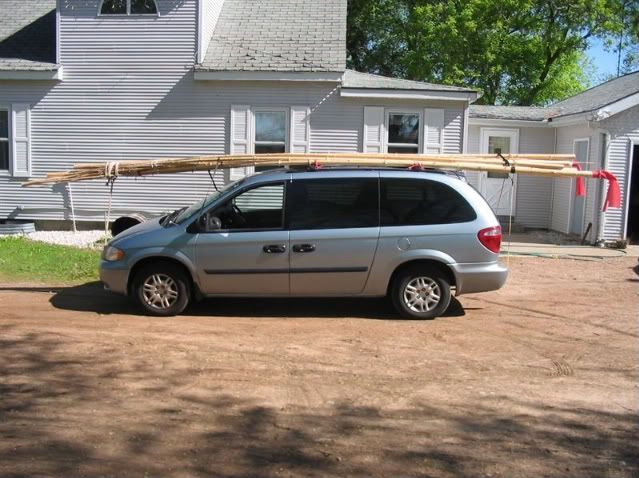
Here is how I built a Tipi for use on camping trips. I don't have pictures of the process of cutting, peeling and smoothing the poles. My two Son's and I harvested the 25 foot pines in a small stand in the middle of a cedar swamp. The pines were growing so thick that they only had branched near the tip. They all grew very straight and tall as they had to compete for the sun light. I think thinning them out did the remaining trees a favor. At least I hope so. Here are the poles right after peeling as I get ready to transport them from the family farm back to my place.
 Here they are drying in the sun. Each day, I would give them a quarter turn as they dried. I had not yet smoothed the poles and removed the little branch stubs 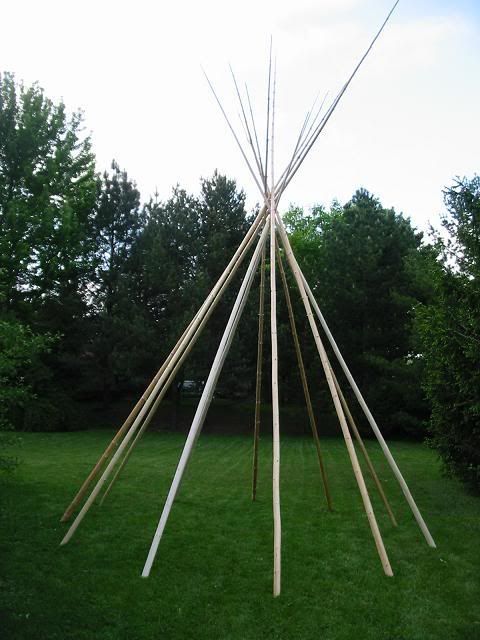 During the drying time, I began to sew the part of the Tipi and the liner. This is the Tipi liner which I made from sewing together a bunch of canvas, painters drop cloths. each was cut into a sort of pie section and when laid flat on the grass it looks like the letter "C" Here it is installed. 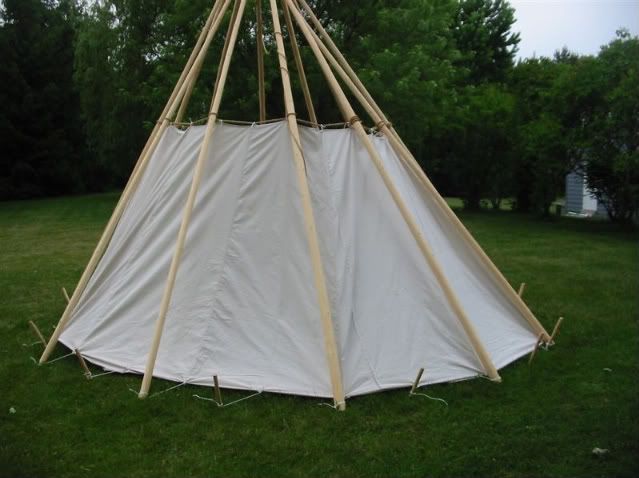 The bottom flaps of the liner lay on the ground and are covered with whatever is used as a floor for the Tipi. It could be hides or canvas but this liner keeps the bugs and dust out as well as the wind during regular Tipi living. It also helps create the draft needed to allow for a small fire to be made in the Tipi. The top pf the liner is held in place with a rope that is tied around all the poles and the bottom in held by tying off to stakes in the ground. 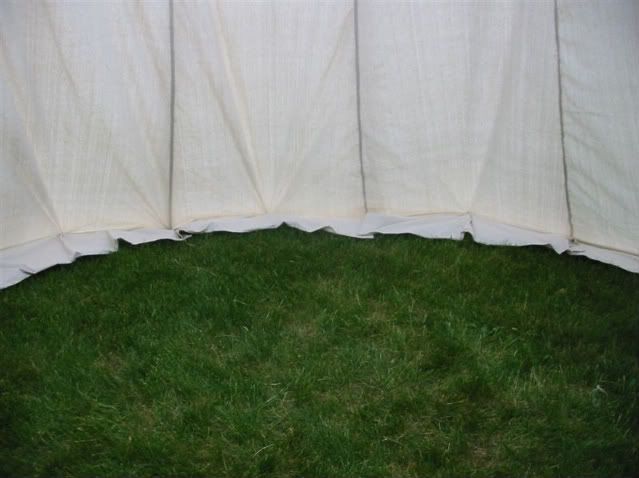 I painted a scene on the liner. It is supposed to look like a painted hide but I did a rather poor job on the outline. 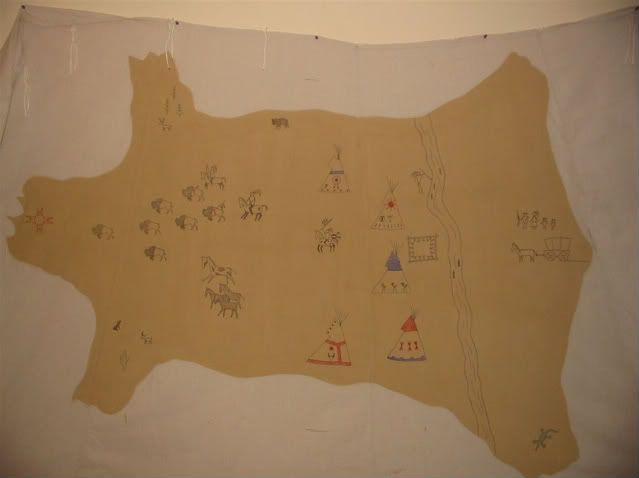 This Tipi is 14 feet across at the bottom and has 25 foot tall poles. I took 33 yards of Waterproofed and fireproofed cotton canvas to do the job.  In order to layout the pattern on the canvas, I first needed to join a few large sections of the canvas together. I used a 60's vintage Singer and at times had to go through up to 6 layers of the canvas. 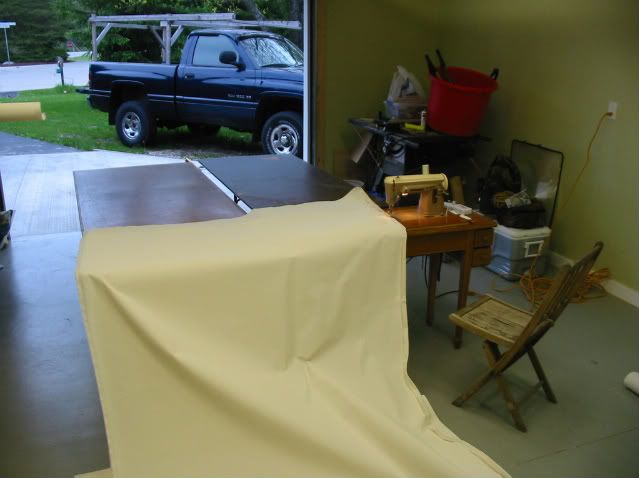 Once sewn. I could mark out the pattern on the canvas and cut out the pattern.   Then it was back to the sewing machine to fold and hem all the cut edges to keep them from fraying. This included the opening for the door 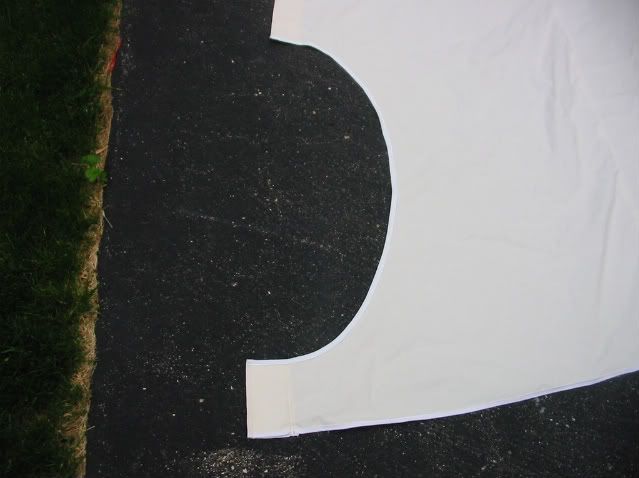 The area for the lifting pole. 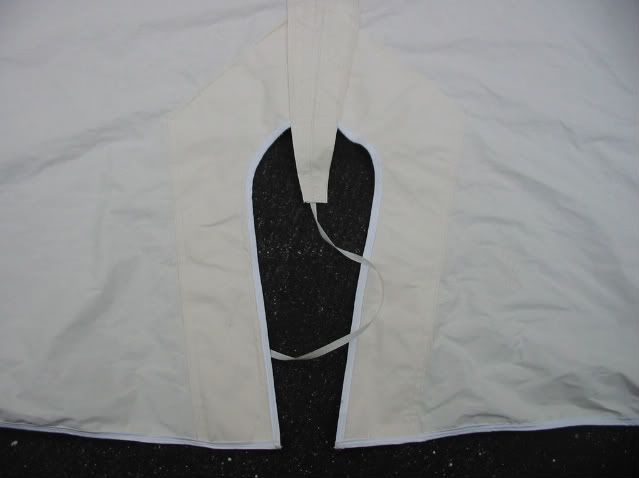 and the pockets for the smoke flap poles. 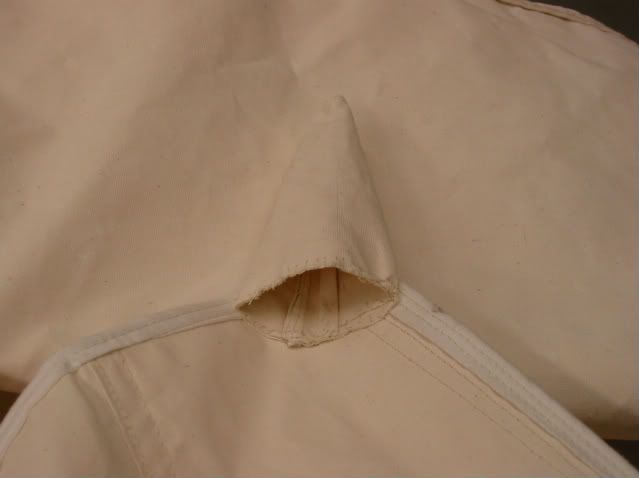 This is what it looks like on the ground. 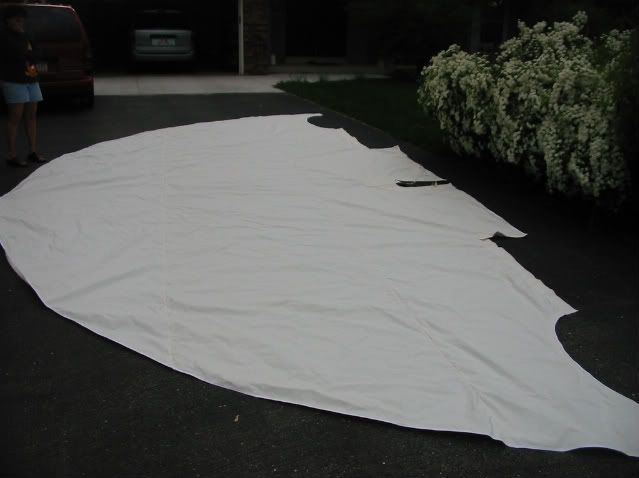
__________________
http://staysharpguide.com/ 
|
|
|


 Threaded Mode