
|
|
#1
 07-30-2008, 01:35 PM
|
|||
|
|||
|
A simple knife
I was asked by a friend to turn his shed antler into a knife handle. This knife was to be a land owner gift. The steel I bought for this project was 1/8 thick 1 1/2 wide O1 (oil quench). The wrapper even came with the recipe instructions on the label.
 The antler he sent. It was a little long so I cut about an inch off the end but I will have a use for that as well. 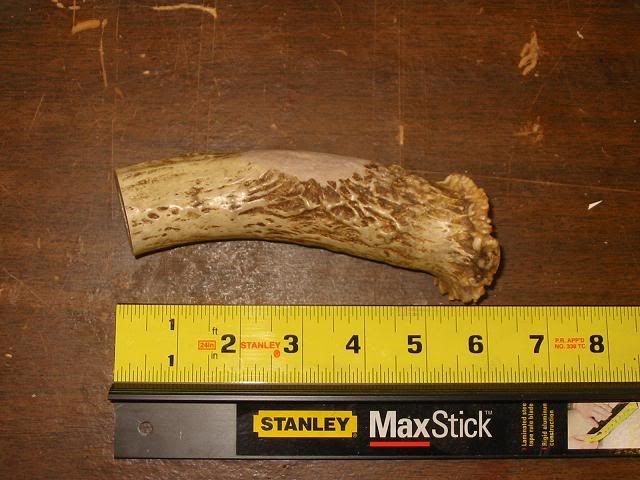 I can see a blank slate here. I can't leave it that way. 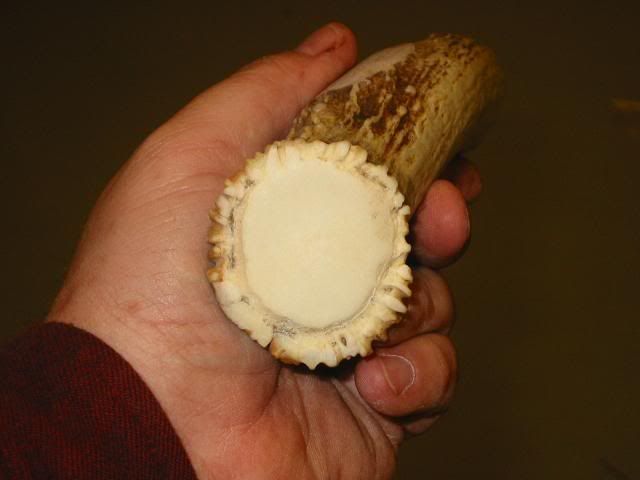 First I removed as much of the core as I needed. 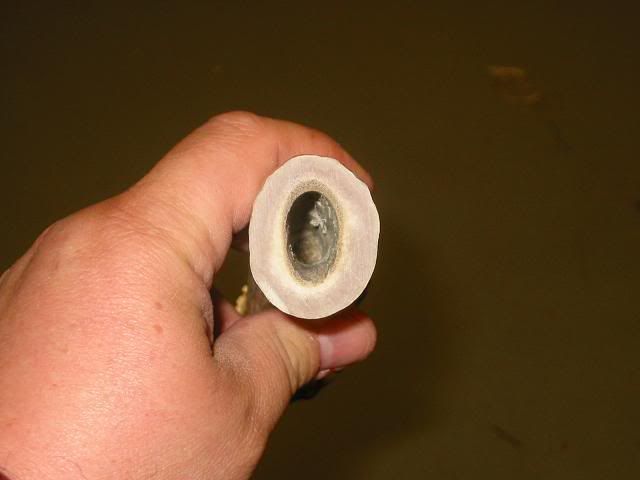 Then I started working on the blade. 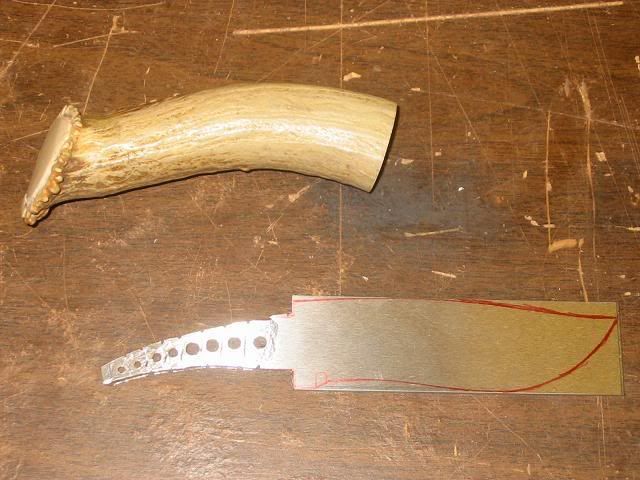 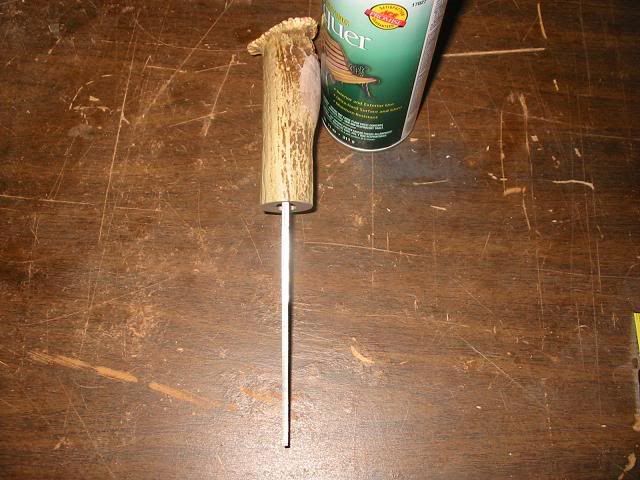 Then I roughed out a finger guard. 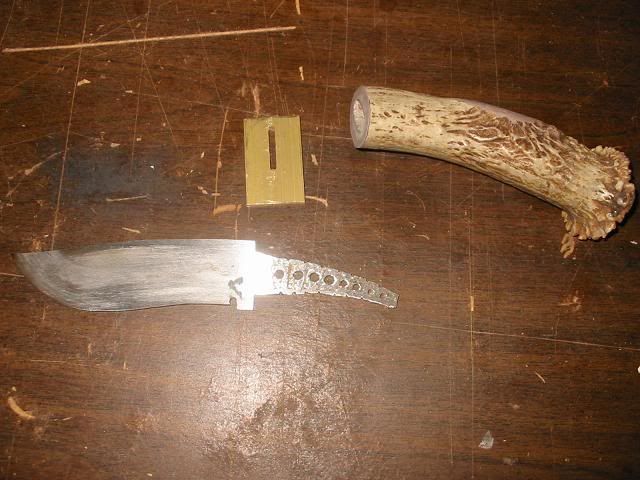 Time to bevel. 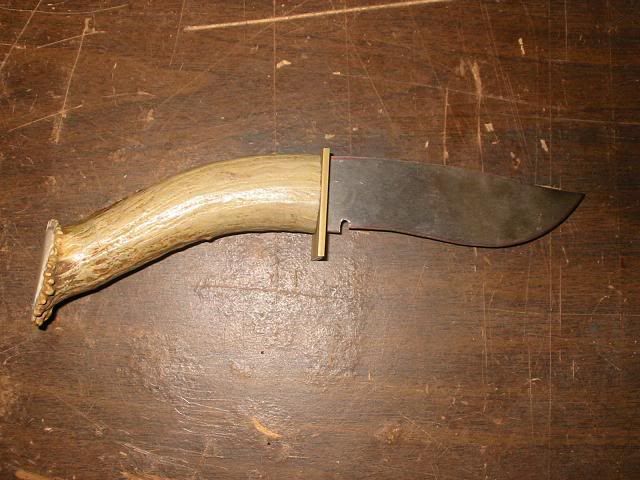
__________________
http://staysharpguide.com/ 
|
|
#2
07-30-2008, 01:37 PM
|
|||
|
|||
|
Beveling completed. Time to heat treat. The label said to use light oil so I did.
 I used the burner from my range in the "Man Room" as well as a MAP gas torch to get the blade hot enough that a magnet would not stick to it. 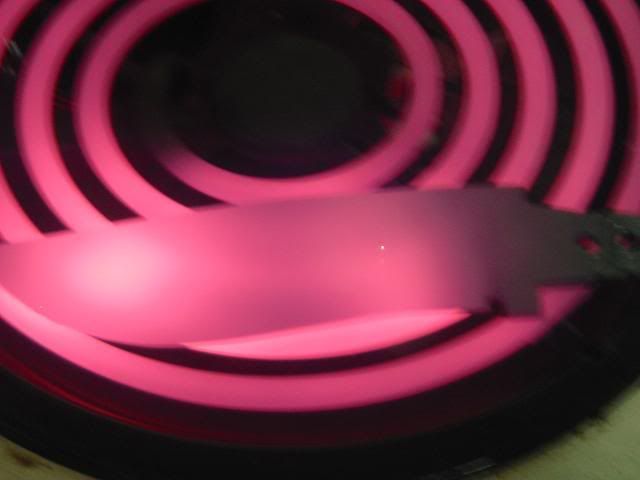 Then it hit the oil. 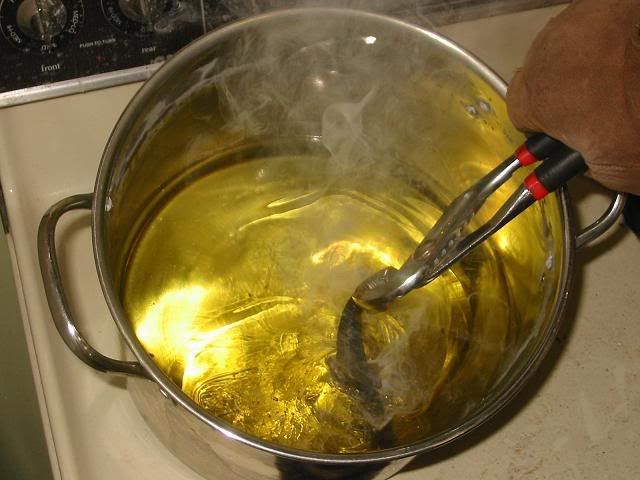 Next, It sat in the oven for one hour at around 500F 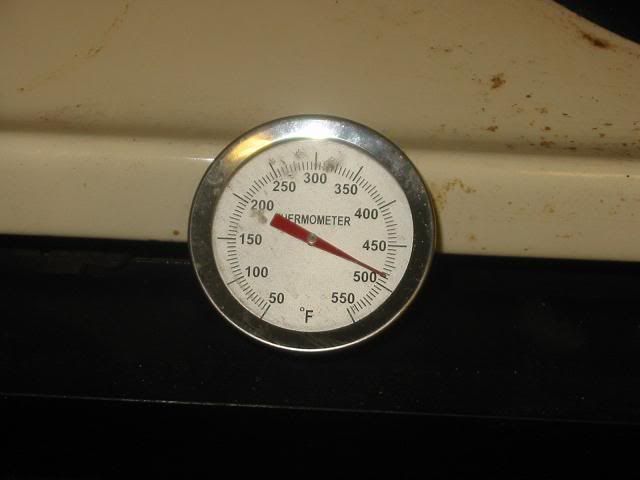 During that time, I worked on the finger guard and the antler to get it ready to assemble. 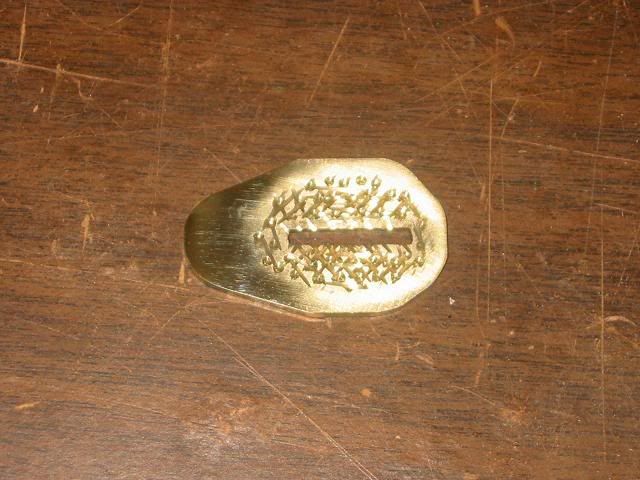 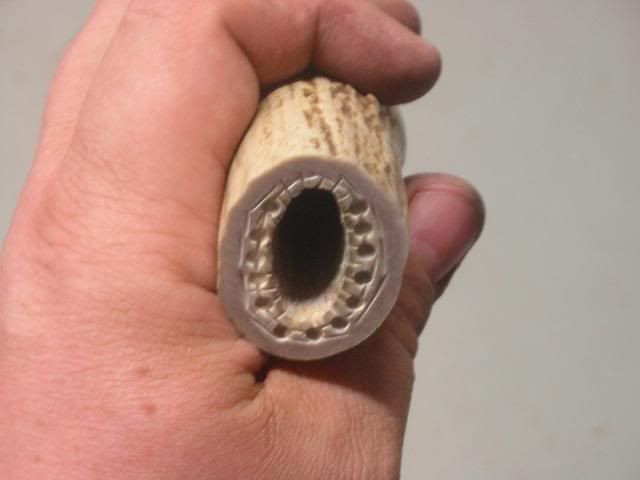 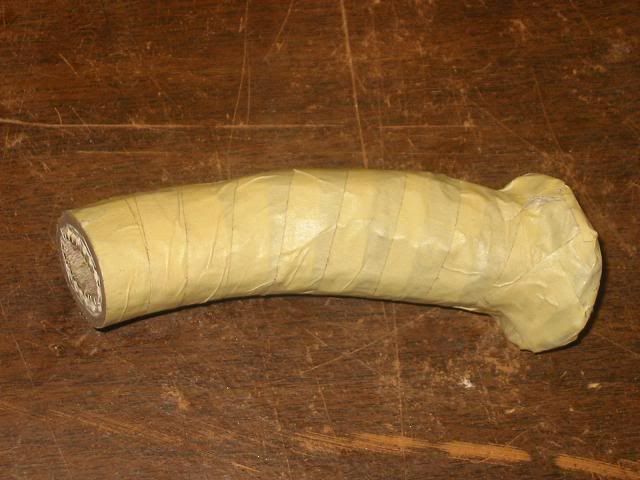 After tempering, I cleaned it up a bit. 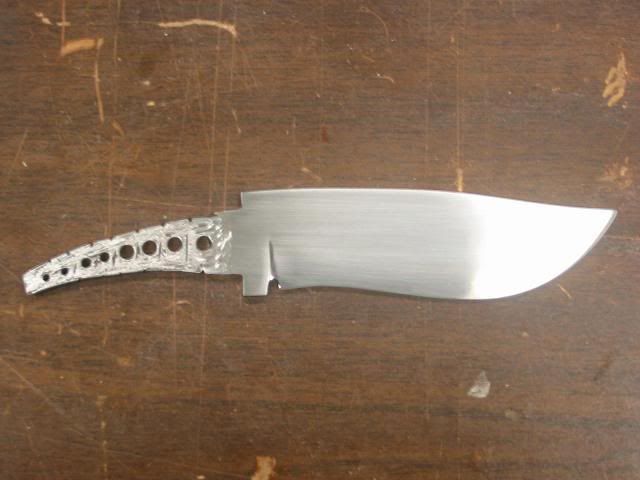 Then I assembled it. 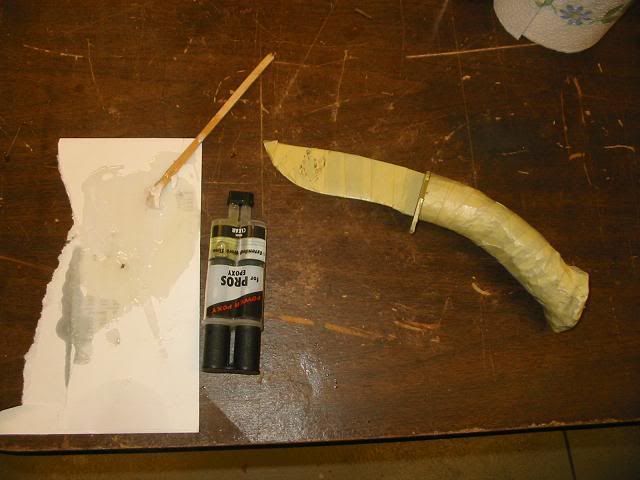 And let it sit over night. 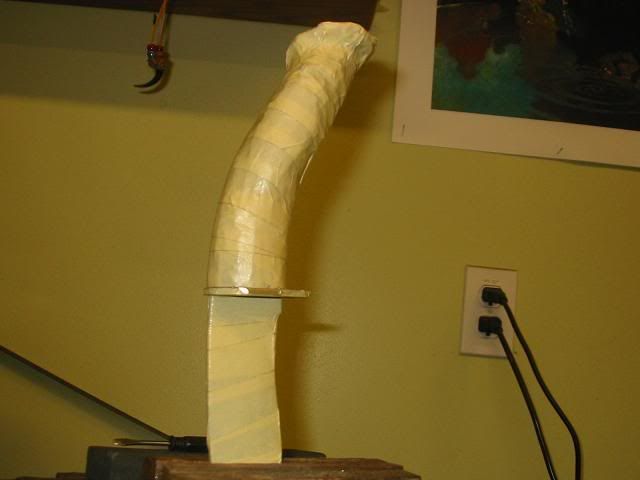 After unwrapping and a bit of buffing, it;s starting to take shape. 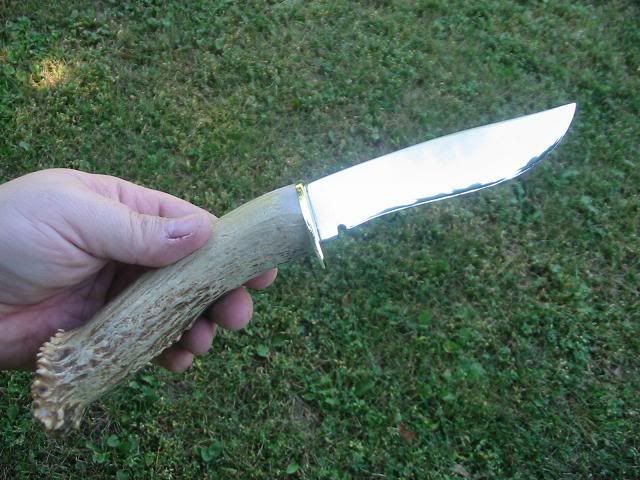 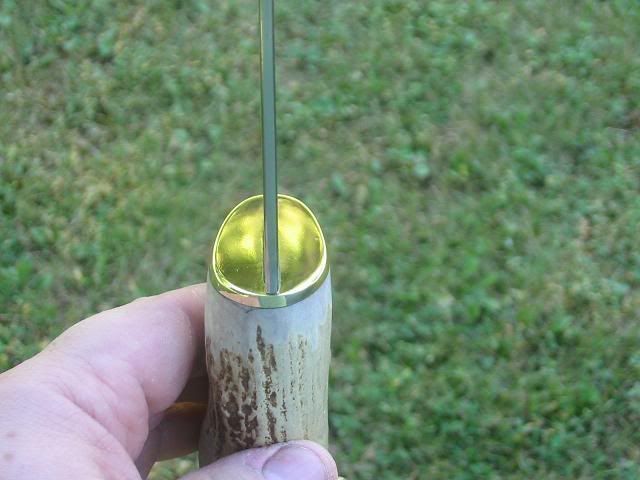 I filled in the blank slate as well. 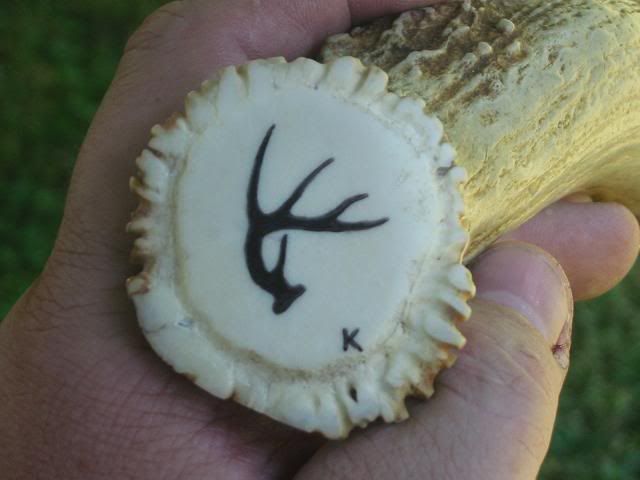 Here is how I used the cut off end of the antler. I cut a slot in it to display the knife. 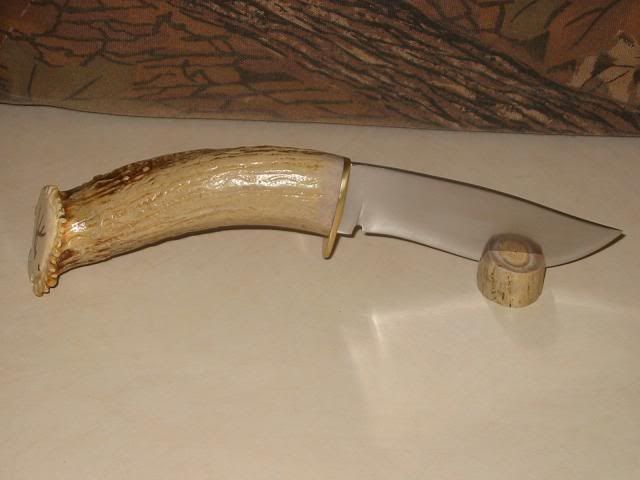 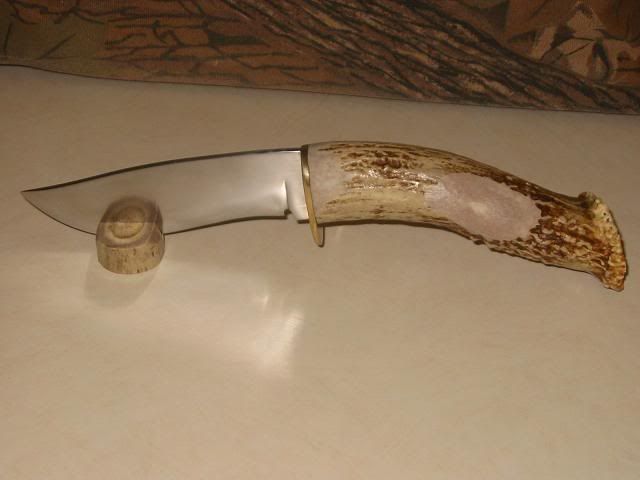
__________________
http://staysharpguide.com/
|
|
#3
07-30-2008, 01:38 PM
|
|||
|
|||
|
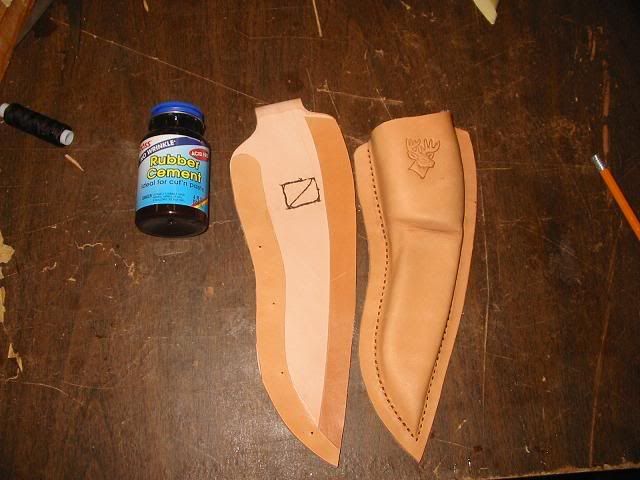
Time to make the sheath. I started with 6 Oz. leather for the face.
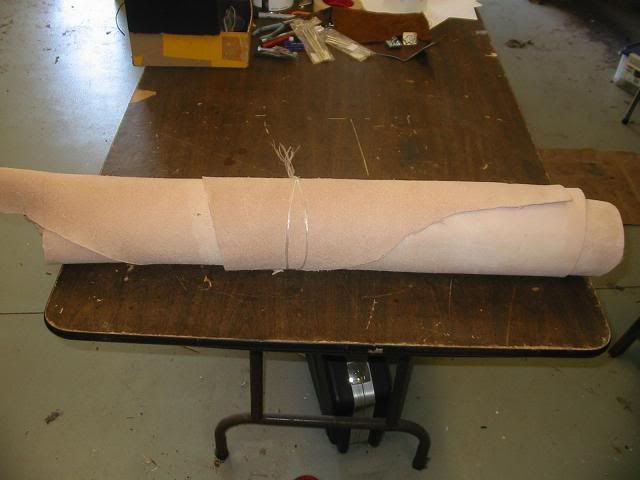 in order not to trap the finger guard (and the knife) in the sheath. I had to build up the area behind the guard. I used foam and tape. 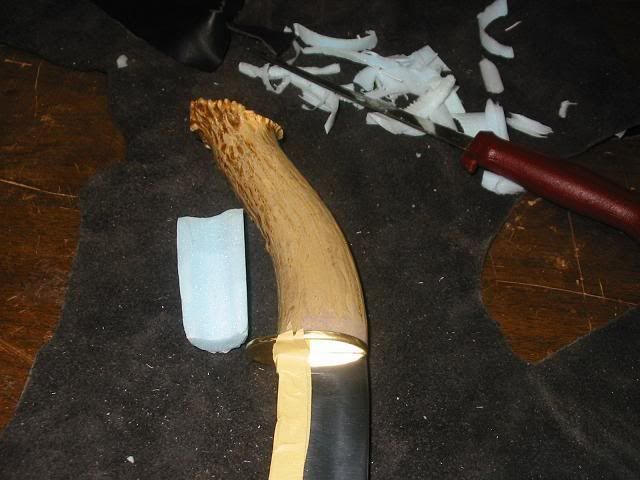 I soaked the leather front and back. 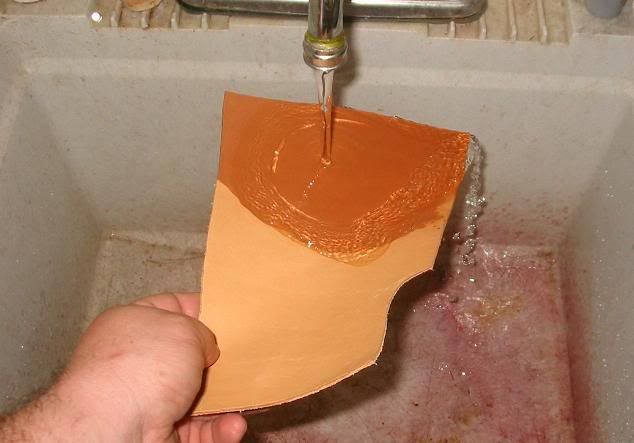 then started massaging the leather over the knife. 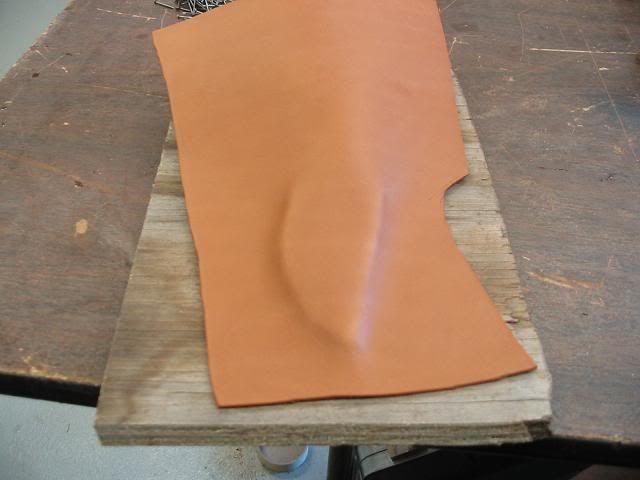 It's kind of like working with a piece of balogna. The white thing a bone folder/creaser  When finished. I set it in the sun to dry. 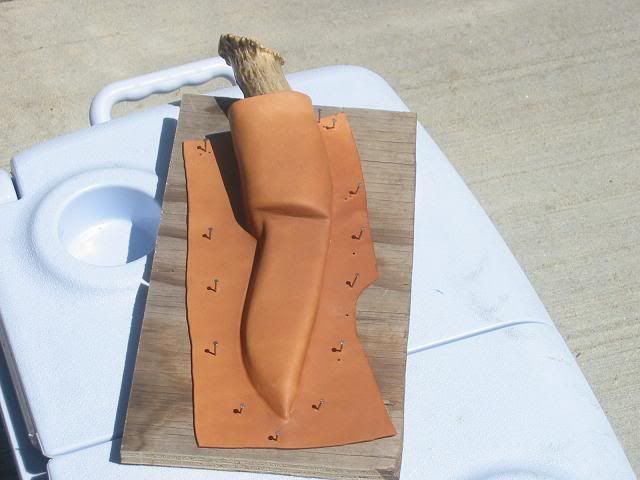 When it dried and while I still had it on the form. I punched the lacing holes. 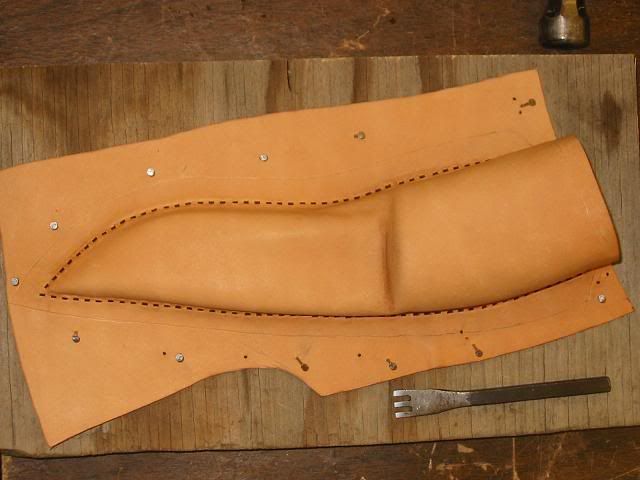 Then I cut it out and used it as a template to make the back of the sheath. For this I used 8 Oz. leather 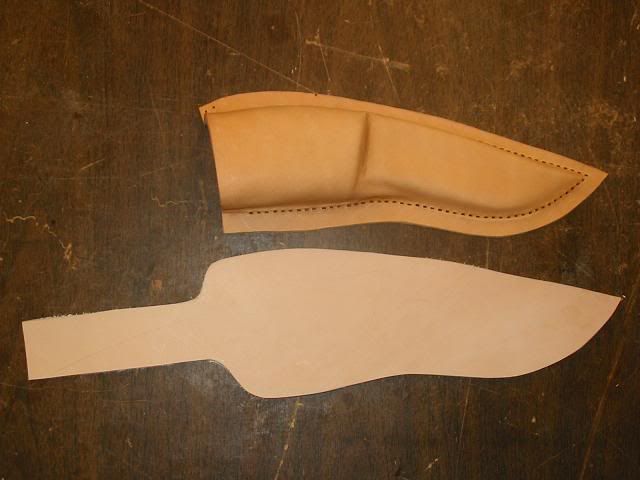 To keep the leather from cracking during the bend, I got it wet. 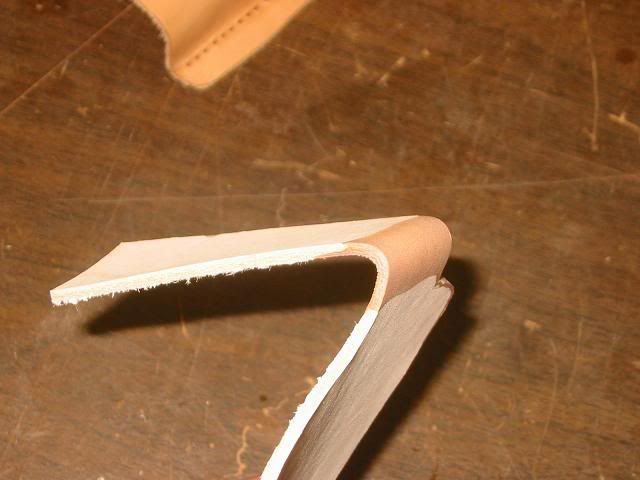 Then I glued and sewed the belt loop in place. 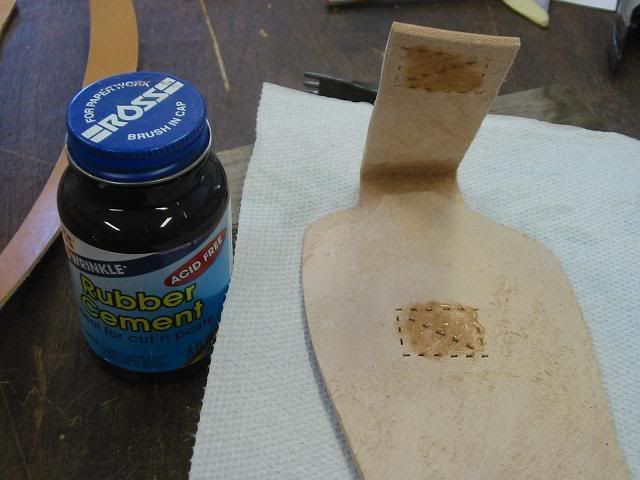 I then added a deer head stamp to the face. 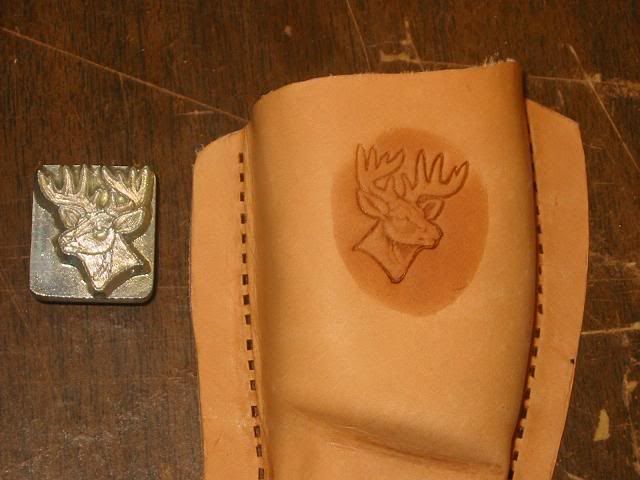
__________________
http://staysharpguide.com/
|
|
#4
07-30-2008, 01:40 PM
|
|||
|
|||
|
Next, I cut the pieces for the welt out of the scrap from the face and glued them in place.
 Then I changed my mind and added a 2nd row of lacing holes To give it more strength. 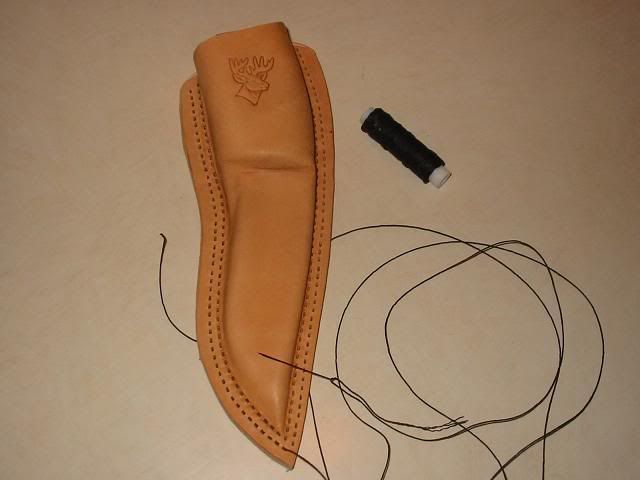 After stitching, I trimmed all around for an even margin. 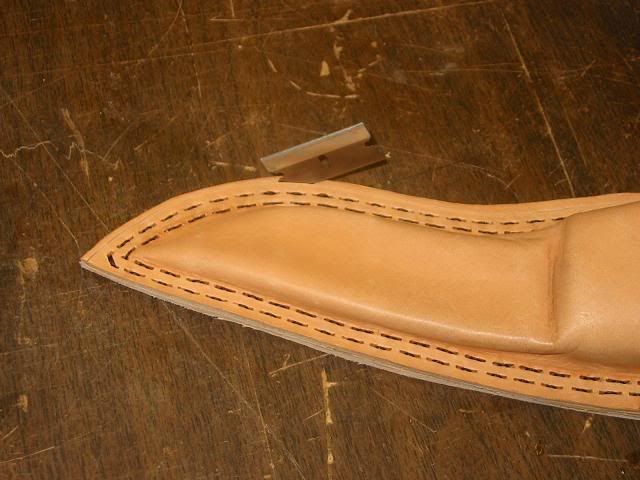 next, I wetted the edge and used the slicker to round it off. 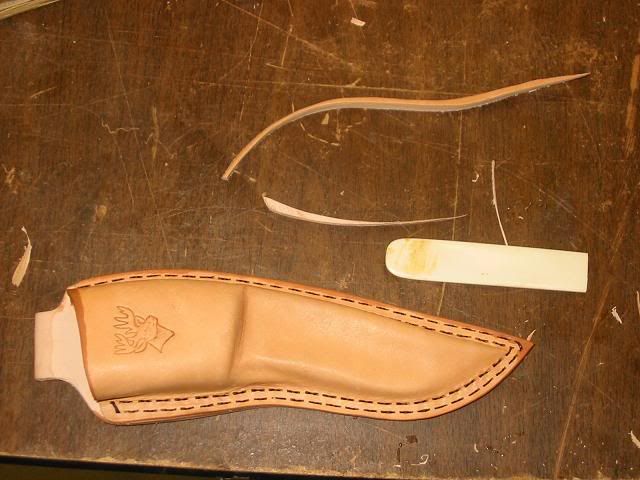  I want this sheath to have a deep rich color but also wanted to see some of the tan through the die so I diluted the stain with alcohol. 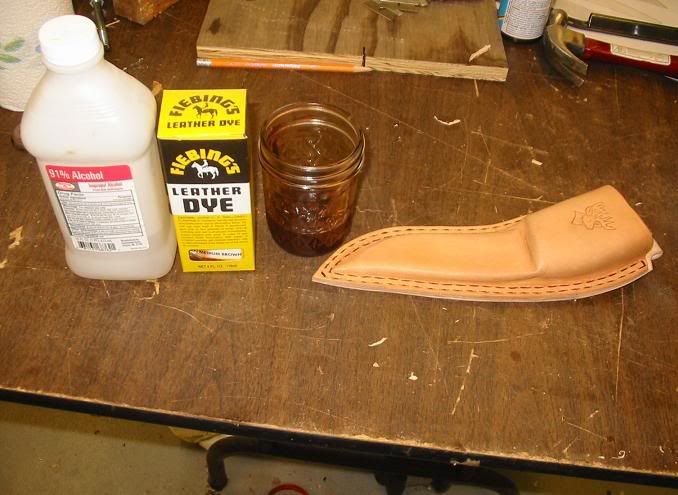 Once thoroughly saturated, I let it sit for a few hours to dry. 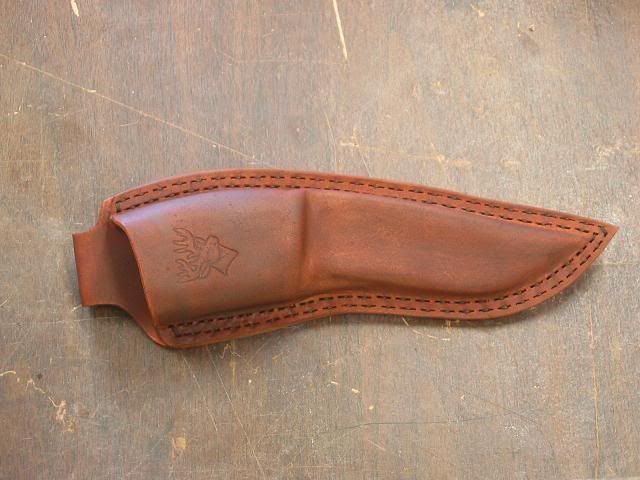 To waterproof the leather and give it a nice sheen, I used mink oil and then warmed the sheath of the burner of the stove to make it soak in. 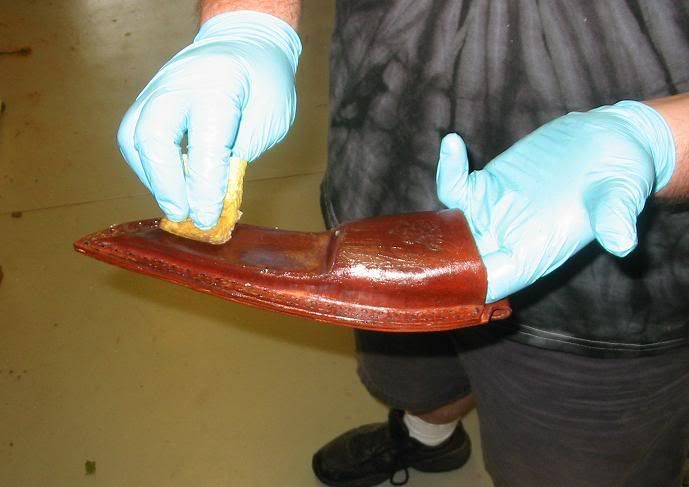 The knife and sheath are done. 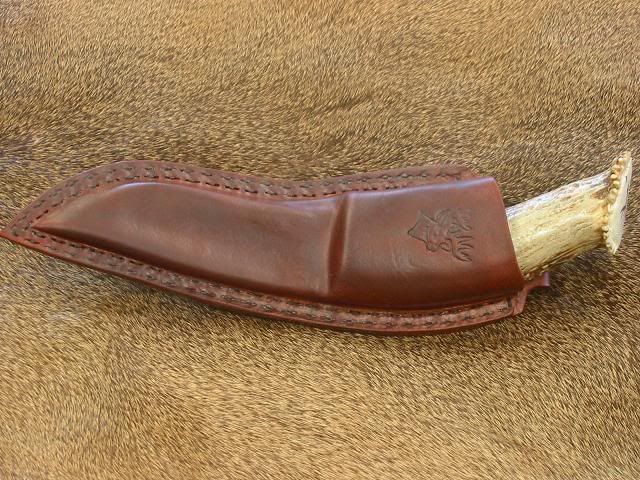 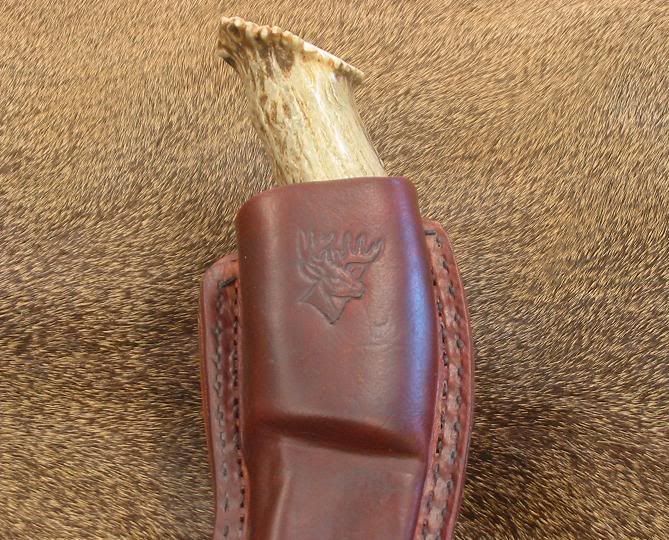 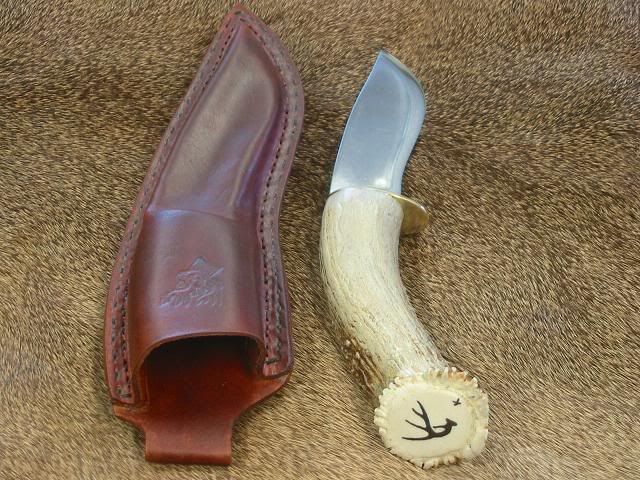 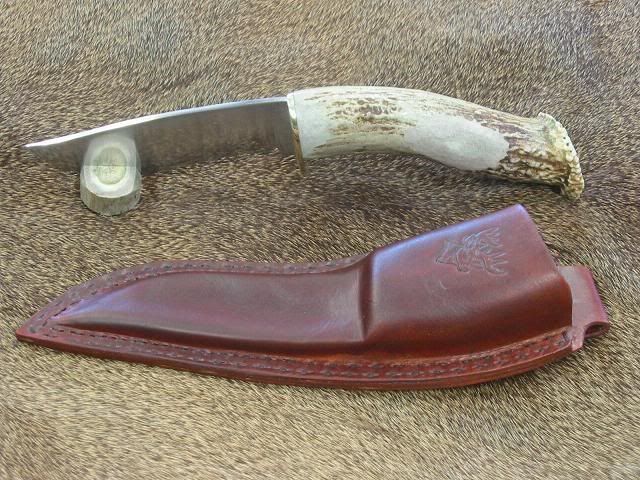
__________________
http://staysharpguide.com/
|
|
#5
07-30-2008, 09:06 PM
|
||||
|
||||
|
Thanks for posting , very interesting.
This is one of the best posts I have ever seen.  
__________________
There is a very fine line between "hobby" and "mental illness." .................Spike1
|
|
#6
07-30-2008, 11:27 PM
|
||||
|
||||
|
Your method for making the sheath is the same method used by the guy my Grandpa got to make the sheath for my Uncle's BSA knife sheath. He used elk skin but I think he made it the same way. That sheath is still in use on that same knife; my Uncle's BSA knife is now my hunting knife. A well made knife and sheath should last a lifetime and then some and that one looks like it will last a good long time. Very nice set.
__________________
USAF Retired  Far better is it to dare mighty things, to win glorius triumphs, even though checkered by failure... than to rank with those poor spirits who neither enjoy nor suffer much, because they live in a gray twilight that knows not victory nor defeat. Theodore Roosevelt Don't sweat the petty things and don't pet the sweaty things
|
|
#8
05-07-2009, 10:42 PM
|
|||
|
|||
|
Rancid
You do beautiful work. You have talent my friend. Could you tell us..how much time did it take from beginning to end?? Knife and sheath.
__________________
skeet@huntchat.com Democracy is two wolves and a lamb voting on what to have for lunch. Liberty is a well-armed lamb contesting the vote!" Benjamin Franklin
|
 |
| Thread Tools | |
| Display Modes | |
|
|


 Linear Mode

